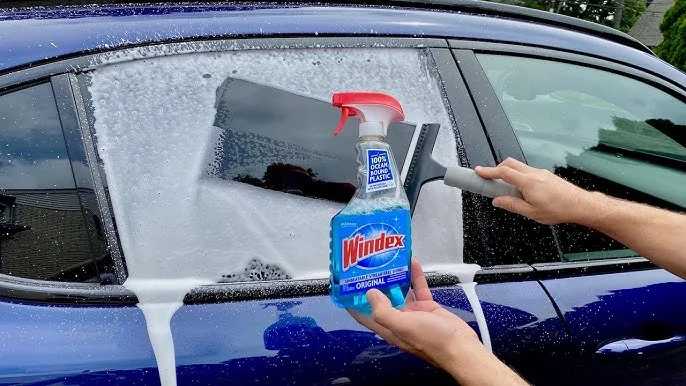
To fix wrinkled car window tint quickly, gently reheat the affected area with a heat gun or hairdryer and smooth out the wrinkles with a squeegee or your fingers. Carefully reheating activates the adhesive, making it easier to flatten the bubbles and wrinkles without damaging the tint.
In just a few simple steps, you can restore your window tint to a sleek, smooth look. First, gently warm the wrinkled area to soften the adhesive, then carefully press out the bubbles and creases. With patience and caution, you can save your tint from having to be fully replaced.
Dealing with wrinkled window tint can feel frustrating, especially after spending time and money on a professional look. Sometimes, minor wrinkles happen due to improper application, temperature changes, or aging. Luckily, fixing this issue doesn’t require removing the entire tint or professional help—most wrinkles can be smoothed out with some heat and a little patience. This method is simple and cost-effective, making it a handy trick for car owners looking to maintain a clean, stylish appearance for their vehicle. So, if you notice those pesky bubbles or wrinkles, don’t rush to peel off the tint. Instead, try these easy steps to straighten things out and keep your car looking sharp.
How to Fix Wrinkled Car Window Tint
Understanding Why Car Window Tint Wrinkles
Car window tint can develop wrinkles for various reasons. It often happens during installation, especially if the process isn’t done carefully. Poor surface preparation or rapid drying can also cause these imperfections. Recognizing these causes helps you choose the best fix.
Common Causes of Wrinkling
- Improper installation: Bubbles or wrinkles happen if the film isn’t smoothed properly.
- Dirty surface: Dust or debris between the film and glass can cause uneven adhesion.
- Temperature issues: Too hot or too cold environments during installation can affect the film’s smoothness.
- Incorrect application technique: Not using enough solution or improper use of tools can lead to wrinkles.
Tools and Materials Needed for Repair
Before fixing your window tint, gather these essential items:
- Utility knife or razor blade: To trim or peel the film.
- Spray bottle: Filled with a soap-water solution for reapplication.
- Linoleum or plastic squeegee: To smooth out wrinkles.
- Microfiber cloths: For cleaning and drying.
- Heat gun or hairdryer: To soften the film for reshaping.
Assessing the Severity of Wrinkles
Not all wrinkles require the same repair approach. Examine whether they are superficial or deep. Superficial wrinkles can often be smoothed, while deep or extensive ones might need removing and reapplying the film.
Light Wrinkles
These appear as minor ripples or bubbles that can usually be fixed easily. If they are small and shallow, gentle smoothing may suffice.
Deep or Large Wrinkles
These are significant dips or folds that might be caused by improper installation or damage. They may require removing the film completely.
Steps to Fix Wrinkled Car Window Tint
Follow these detailed steps to repair your window tint effectively.
Step 1: Clean the Surface
Thoroughly clean the interior glass using a microfiber cloth and a mild glass cleaner. Dirt or dust can worsen wrinkles if left underneath the film.
Step 2: Assess and Decide
Determine if minor wrinkles can be smoothed or if removal is needed. For superficial issues, proceed with smoothing. If the wrinkles are extensive, removal might be better.
Step 3: Apply Gentle Heat
Use a heat gun or hairdryer set on a low setting and hold it several inches from the film. Warm the area gently to soften the adhesive and make the film more pliable.
Step 4: Use a Squeegee
Starting at the center of the wrinkle, gently press outward with a microfiber cloth or squeegee. Apply even pressure to flatten the wrinkles gradually. Avoid pressing too hard to prevent tearing.
Step 5: Resmooth and Reapply
If the wrinkle persists, lightly spray the area with a soap-water solution and re-smooth the film. Repeat the heating and smoothing process as needed.
Step 6: Trim Excess Film
If wrinkles are near the edges, carefully trim the excess with a razor blade, ensuring a clean finish. Be cautious not to cut into the glass.
Step 7: Allow the Film to Set
Let the window sit undisturbed for at least 24 hours. During this time, avoid rolling down the window or exposing the film to water or extreme temperature changes.
Advanced Fix: Removing and Reapplying the Tint
If wrinkles cannot be smoothed out, removing and reapplying the film is often the best solution.
How to Remove Wrinkled Tint
1. Use a razor blade to carefully peel off the old tint starting from a corner. Be gentle to avoid scratches or damage.
2. Clean the glass thoroughly to remove any adhesive residue and dirt.
3. Reapply the tint with proper techniques, ensuring the surface is perfectly clean and dry.
4. Use a spray solution to help position the film smoothly and eliminate bubbles or wrinkles during reapplication.
Tips for Preventing Future Wrinkles
Prevention is better than cure. Follow these tips to keep your car tint smooth after installation:
- Work in controlled temperatures: Ideal conditions are between 70°F and 85°F.
- Ensure the surface is spotless: Clean the glass thoroughly before installation.
- Use proper tools and solutions: Use a high-quality squeegee and application solutions.
- Follow manufacturer instructions: Each tint film may require specific application techniques.
- Hire a professional if unsure: Expert installation can minimize wrinkles and errors.
Additional Recommendations and Cautions
– Avoid rushing the process; patience ensures better results.
– Never spray too much solution, as excess liquid can cause bubbles and wrinkles.
– Do not attempt to fix deep wrinkles with heat alone; partial removal might be necessary.
– Be cautious with sharp tools to prevent scratching the glass or damaging the film.
Related Topics
– Proper maintenance of car window tint
– How to choose the best window tint for your vehicle
– DIY vs. professional installation of car window tint
– Common mistakes to avoid during tint installation
By following these steps carefully, you can fix wrinkled car window tint effectively. Patience and attention to detail are key to achieving a smooth, professional-looking finish. Proper care and installation techniques will also help prevent future issues, saving you time and money.
How To Fix Wrinkles In Window Tint
Frequently Asked Questions
What steps can I take to smooth out wrinkles in my car window tint at home?
Begin by cleaning the tinted surface with a mixture of water and a few drops of dish soap to remove dust and debris. Use a spray bottle to generously spray this solution onto the wrinkled area. Gently lift the edge of the tint near the wrinkle with a plastic scraper or squeegee, then carefully smooth out the wrinkle by pushing the air and any excess water toward the edges. Wipe away any remaining moisture with a clean microfiber cloth. Repeat this process if necessary, but be patient to avoid damaging the tint.
Is it possible to fix small wrinkles without professional help?
Yes, small wrinkles often respond well to manual adjustments. Make sure the tint and surrounding surface are clean and slightly dampened. Use a plastic card or squeegee to push out the wrinkle from the center outward. Applying gentle heat with a heat gun or hairdryer set to low can help soften the adhesive, making it easier to smooth out the tint. Work slowly and carefully to prevent creating new bubbles or wrinkles, and avoid over-heating the film.
What precautions should I take during the process to avoid damaging the tint?
Always handle the tint gently and avoid applying excessive force, which can cause tears or more wrinkles. Use a soft plastic scraper or squeegee instead of sharp tools. Keep the surface damp throughout the process to reduce friction and prevent scratching. Be cautious with heat sources, ensuring they are not too hot to avoid melting or distorting the film. Test any heat application on a small, inconspicuous area first, and work in a well-ventilated space for safety.
Final Thoughts
To fix wrinkled car window tint, start by removing the tint carefully with a heat gun and a razor blade. Smooth out the film by applying gentle heat and pulling it taut. Use a squeegee to press out air bubbles and wrinkles, ensuring the tint adheres properly. With patience and proper technique, you can restore a sleek appearance to your windows and prevent future issues.


