To fix rippled car window tint quickly, gently reapply heat with a heat gun or hairdryer while smoothing out the bubbles with a squeegee. If the ripples are stubborn, carefully peel back the affected section and reapply a fresh layer of tint, ensuring proper adhesive contact. Addressing ripples early can save you time and money, so don’t wait too long to fix these imperfections.
If your car window tint has developed ripples, don’t panic—it’s a common issue that can often be fixed without replacing the entire film. The key is to carefully reheat the affected area and smooth it out using a squeegee or similar tool. In more severe cases, removing and reapplying the tint might be necessary. With patience and the right technique, you can restore your window tint to a flawless finish.
Getting rid of ripples in your car window tint might seem challenging at first, but with some simple tricks, it’s doable. From using heat to soften the film to gently reapplying or smoothing out the bubbles, you can often fix the problem yourself. Proper application and quick action are essential to maintaining a sleek, professional look for your tinted windows, and fixing ripples is just part of the maintenance that keeps your car looking sharp.
How to Fix Rippled Car Window Tint
Understanding Why Car Window Tint Rips or Becomes Rippled
Car window tint can ripple or rip due to various reasons. Factors like poor installation, excessive heat, or using cheap materials often cause these problems. Knowing the root cause helps you decide the right fix.
Common Causes of Tint Ripple
- Poor Application Technique: Incorrectly applying tint film leaves air bubbles and ridges.
- Heat Damage: Excessive sunlight or high temperatures can cause the tint to stretch and ripple.
- Age and Wear: Old or worn tint loses adhesion over time, leading to ripples.
- Moisture Entrapment: Trapped air or water during installation creates ripples as it escapes or evaporates.
Assessing the Severity of Ripples
Before fixing, examine how extensive the ripples are. Minor ripples may be fixable without removing the tint, while large ripples or rips often require complete replacement.
Tools and Materials Needed for the Repair
Creating a seamless fix involves getting the right tools. Here’s what you’ll need:
- Heat Gun or Hair Dryer: For softening the tint and reducing tension.
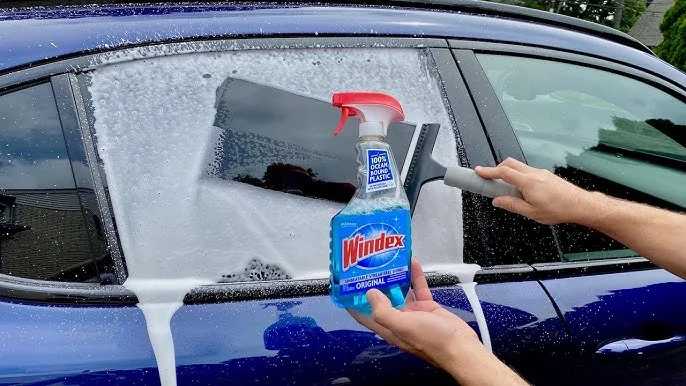
- Spray Bottle with Water and Soap Solution: To re-wet the film for repositioning.
- Squeegee or Plastic Card: To smooth out air bubbles and wrinkles.
- Cloth or Microfiber Towel: For cleaning and drying the surface.
- Utility Knife or Razor Blade: For trimming excess tint if needed.
Step-by-Step Guide to Fix Minor Ripples
Fixing small ripples is often easier and involves less work. Follow these steps carefully:
Step 1: Clean the Surface
Use a microfiber cloth with a gentle cleaner to remove dust and debris. A clean surface ensures better adhesion during the repair.
Step 2: Warm the Film
Set your heat gun or hair dryer to a low setting. Gently warm the rippled area, which makes the film more elastic and easier to reposition.
Step 3: Re-wet the Tint
Spray a mixture of water and a few drops of dish soap onto the rippled area. The soapy water creates surface tension that helps you slide the tint.
Step 4: Smooth Out the Ripples
Use a squeegee or plastic card to push out air bubbles and wrinkles from the center outward. Be gentle to avoid tearing the tint.
Step 5: Apply Heat and Continue Smoothing
Warm the area again slightly, then continue to smooth. Repeat this process until the ripples diminish or disappear.
Step 6: Let It Dry
Allow the film to dry completely, ideally for several hours to a day. Avoid exposing the window to extreme sunlight during this drying period.
Fixing Larger Ripples or Rips
For significant ripples, a full removal and reapplication might be necessary.
When to Remove the Existing Tint
If ripples are widespread or deep, removing the old film prevents uneven adhesion and future problems.
How to Remove Car Window Tint Safely
Follow these steps carefully:
- Heat the tint using a heat gun to soften the adhesive.
- Peel off the film gently, starting from a corner.
- Apply a window adhesive remover or soapy water to eliminate residual glue.
- Clean the glass thoroughly with alcohol or a glass cleaner.
Reapplying Tint Correctly
Proper reapplication of tint minimizes future ripple issues. Follow these tips:
Choose Quality Materials
Opt for high-quality tint film with a good adhesive. It lasts longer and resists heat better.
Ensure a Smooth Installation Surface
Make sure the glass is spotless and free from dust. Any particles can cause ripples or bubbles.
Use Proper Techniques
Start aligning the tint from the top or bottom and work gradually down or up, smoothing out bubbles as you go.
Control the Environment
Install in a dust-free, shaded, and temperature-controlled environment to prevent premature drying or bubbling.
Preventive Measures to Avoid Ripples in the Future
Prevention is better than cure when it comes to car tint. Here are tips to avoid rippling issues:
- Hire Professional Installers: Experienced technicians use proper tools and techniques.
- Avoid Extreme Temperatures During Installation: Install when the weather is moderate.
- Choose Quality Tints: Higher-quality films are more durable and easier to install.
- Maintain the Tint: Regular cleaning and inspection help catch issues early.
Additional Tips and Tricks
– Always test the heat settings on a small section first.
– Use a plastic scraper or squeegee to avoid scratching the film.
– Work patiently, taking your time with each step.
– If unsure, consult with professional window tint installers for guidance.
Alternative Solutions for Severe Ripples
If DIY methods fail, consider professional repair services. Experts can re-tint or replace the damaged film quickly, ensuring a smooth, flawless finish.
Fixing rippled car window tint requires patience and the right tools. Minor ripples can often be repaired with careful reapplication of heat and water. Larger problems might need professional removal and reinstallation. Following proper techniques helps maintain a clear, smooth, and long-lasting tint that enhances your vehicle’s look and privacy.
Curling or Peeling Window Tint? Try These Two Things!
Frequently Asked Questions
What are the best methods to smooth out ripples in car window tint?
To smooth out ripples, start by carefully lifting the affected section of the tint using a squeegee or a plastic card. Gently peel back the tint to where the ripple begins, ensuring not to stretch or tear it. Reapply a small amount of water or application solution beneath the film for better repositioning. Carefully flatten the tint using even pressure from the center outward, working out the ripple. If necessary, repeat the process until the ripple diminishes or disappears.
Can applying heat help in fixing ripples in car window tint?
Applying gentle heat can make the tint more flexible and easier to work with. Use a heat gun or a hairdryer on a low setting, keeping it at a safe distance to avoid overheating. Warm the area with ripples evenly, which softens the adhesive and allows you to smooth the film out with a squeegee. Be cautious not to overheat, as excessive heat can cause the tint to bubble or peel. Work slowly and patiently during this process for best results.
What should I do if the ripple persists after attempting to fix it?
If ripples remain after initial efforts, consider removing the affected section and reapplying the tint properly. Carefully peel the rippled area back, clean the glass thoroughly to remove any residue or dust, and reapply the tint using proper techniques. Ensure the glass surface is completely smooth and free of debris before repositioning the film. If you find it challenging to fix the ripples yourself, consulting a professional installer can provide a more seamless and durable solution.
Final Thoughts
To fix rippled car window tint, start by cleaning the window thoroughly to remove dust and dirt. Use a squeegee to smooth out the ripples gently, pressing from the center toward the edges. If needed, apply a small amount of heat with a hairdryer to make the film more pliable.
Carefully reapply or adjust the film to eliminate the ripples, ensuring it stays aligned. If the ripples persist, consider redoing the tint or consulting a professional. Remember, how to fix rippled car window tint involves patience and careful adjustment for a flawless finish.


