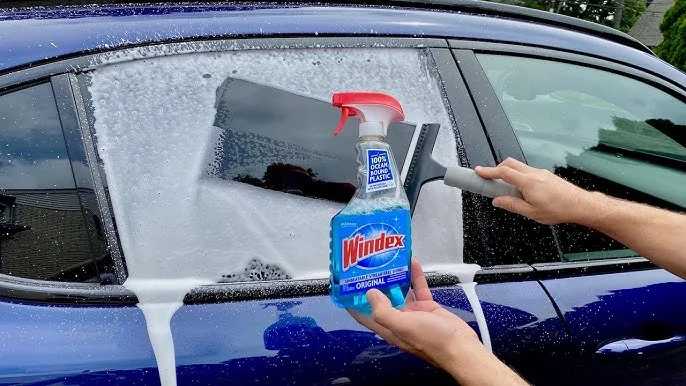
To install car window tint quickly and effectively, clean the windows thoroughly, cut the tint film to size, peel off the backing, and carefully apply the film using a squeegee to smooth out air bubbles. Start from the top and work your way down for a flawless finish. Using a heat gun can help mold the tint around curves for a professional look.
Installing car window tint might seem daunting, but with the right tools and patience, you can achieve professional-looking results yourself. First, ensure your windows are spotless—clean glass makes a huge difference. Measure and cut your tint film to fit each window, leaving a slight overhang. Carefully peel the backing and spray the adhesive side with a solution of water and a few drops of dish soap to prevent sticking prematurely. Align the film on the window, then use a squeegee to smooth out bubbles and excess liquid. Finish with a heat gun to contour the tint and trim any excess for a perfect finish. This step-by-step approach will help you transform your car with a sleek, professional tint.
How to Install Car Window Tint: A Complete Guide
Installing car window tint can seem challenging, but with the right steps and tools, it becomes manageable. This process helps reduce heat, protect your interior, and add privacy to your vehicle. Here’s a step-by-step guide that covers everything you need to know about how to install car window tint successfully.
Preparing Your Workspace and Tools
Before starting, find a clean, dust-free area with plenty of natural light. Working in a shaded place prevents the tint from drying too quickly or unevenly. Gather all necessary tools, including:
- Car window tint film
- Spray bottles filled with soapy water
- Utility knives or precision blades
- Squeegees or scrapers
- Microfiber cloths
- Measuring tape or ruler
- Gloves to protect your hands
- Lint-free towels
Proper preparation ensures a smooth installation process and a professional finish.
Measuring and Cutting the Tint Film
Start by measuring each window’s dimensions accurately using a measuring tape. Add an extra inch to each side to allow for adjustments during installation.
Next, carefully cut the tint film to size using a utility knife or scissors, following the measurements. Cutting the film in a clean, smooth motion prevents jagged edges. Make sure to keep the film covered with plastic wrap if you’re not applying it immediately to prevent dust accumulation.
Cleaning the Windows Thoroughly
Clean the window surface meticulously to remove dirt, dust, and grease. Use a microfiber cloth and a mixture of water and a few drops of soap. Avoid using ammonia-based cleaners, as they can damage the tint film.
Wipe the entire area and dry it completely. Any residue or moisture left on the glass can cause bubbles and imperfections under the tint. For best results, clean the window again just before applying the film.
Applying the Tint Film
Begin by peeling back the protective layer of the tint film, exposing the adhesive side. Spritz the adhesive side lightly with soapy water to help position the film easily.
Align the film carefully with the window edges, starting at the top. Use your fingers or a squeegee to gently press the film onto the glass, working from the center outward to eliminate air bubbles.
Removing Air Bubbles and Excess Water
As you apply, use a squeegee to press out air bubbles and excess water. Work in straight lines from the center toward the edges for a smooth finish.
If air bubbles persist, gently lift the film slightly and reapply, smoothing as you go. For stubborn bubbles, a pin can be used to poke small holes to release trapped air.
Trimming and Finishing the Edges
Once the film is smoothly applied, use a utility knife to carefully trim the excess at the edges of the window. Keep the blade at a slight angle for a clean cut.
Check all edges and corners, ensuring the film adheres well without lifting. Use the squeegee to press down any loose edges for a lasting bond.
Drying and Curing the Tint Film
After application, allow the tint to dry properly. Avoid rolling down windows or exposing the car to rain for at least 24 to 48 hours.
In hot or sunny weather, the drying process might be faster, but patience ensures the best possible result. During curing, the film bonds more securely to the glass, resulting in fewer bubbles or peeling.
Additional Tips for a Perfect Installation
Here are some helpful tips to improve your tinting experience:
- Work slowly and carefully to avoid mistakes.
- Maintain a clean environment to prevent dust from sticking to the film.
- Use plenty of soapy water during application to facilitate repositioning.
- Test cuttings on scrap film before applying to important windows.
- Follow local regulations regarding tint darkness and reflectivity to avoid fines.
Common Challenges and How to Overcome Them
Even with careful work, you might face some issues. Bubbles can be smoothed out if caught early. If stubborn, lifting the film slightly and reapplying with more soapy water helps.
If the tint film wrinkles during application, gently peel it back and try reapplying. Patience is key to achieving professional-looking results.
Maintaining Your Car Window Tint
Once installed, proper maintenance extends the life of the tint. Use mild soap and water to clean the windows regularly. Avoid abrasive cleaners or scrubbing with rough cloths.
Park in shaded areas when possible to prevent heat damage. Periodically inspect the edges and reapply if any peeling occurs.
Cost Considerations and Professional Installation
Deciding between DIY and professional installation depends on your skill level and budget. DIY is cost-effective but requires patience and precision.
Professional installers guarantee a clean, durable finish. They also have access to high-quality materials and tools, which might be worth the extra cost.
Related Topics: Choosing the Right Window Tint
When selecting tint, consider factors like:
- Tint darkness (percentage of light allowed through)
- Type of film (dyed, metallic, carbon, ceramic)
- Legal restrictions in your area
- UV protection and heat reduction capabilities
Researching these aspects helps ensure your new tint meets your needs and complies with regulations.
Applying car window tint is a rewarding project that improves comfort and privacy. Patience, preparation, and attention to detail lead to a smooth, professional-looking finish. Follow these steps carefully, and you’ll have tinted windows that look great and last for years.
How To: Properly Apply Window Tint
Frequently Asked Questions
What tools are necessary to correctly install car window tint?
To install car window tint properly, gather essential tools such as a squeegee or application roller, a sharp utility knife or razor blade, a spray bottle filled with a mixture of water and a few drops of dish soap, microfiber cloths, and a heat gun or hairdryer. These tools help ensure a smooth application, prevent air bubbles, and allow precise trimming of the film to fit your windows.
How do I prepare the car windows before applying the tint?
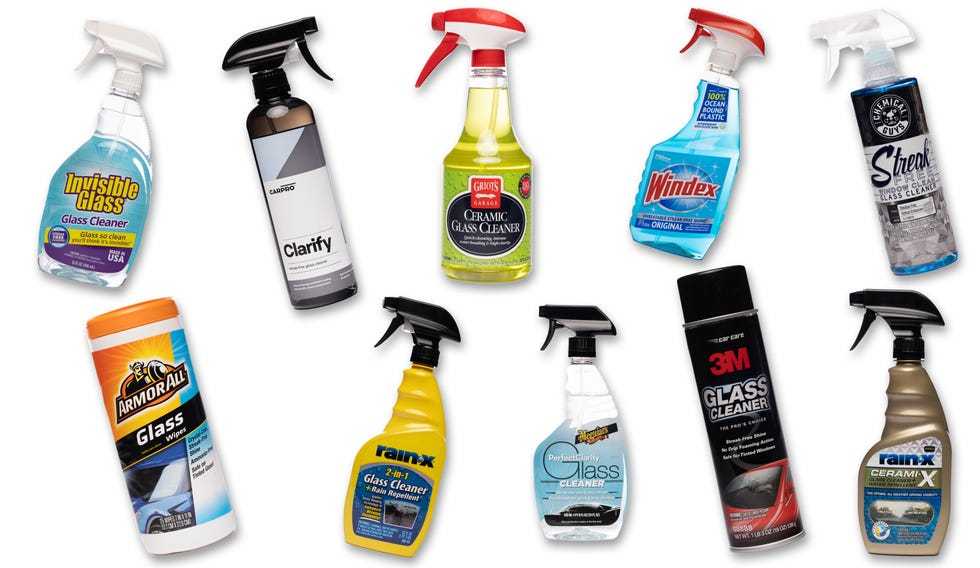
Start by thoroughly cleaning the window surface with a glass cleaner to remove dirt, dust, and grease. Use a microfiber cloth to wipe away any residue and ensure the glass is completely dry. For stubborn spots or adhesive residues, apply a small amount of rubbing alcohol. Proper preparation creates a clean surface, which is essential for a smooth and long-lasting tint application.
What is the best technique for applying car window tint without creating air bubbles?
Begin by carefully spraying the window with a water-soap mixture to allow the tint film to slide into position. Peel off the backing from the tint film gradually and apply it from the top or center, smoothing it out with a squeegee as you go. Work from the center outward to push out any air pockets and water. Use a heat gun to gently warm the film if needed, making it more flexible and easier to conform to the window’s shape. Take your time, and avoid pressing too hard to prevent creases or tears.
How can I ensure a clean and precise cut when trimming excess film after installation?
Use a sharp utility knife or razor blade held at a slight angle to carefully trim the excess film along the window edges. Keep the blade steady and apply gentle, even pressure to avoid scratches on the glass or uneven cuts. It helps to hold the blade against a straight edge or use a pre-measured template for accuracy. Wipe the edges with a clean cloth afterward to remove any small scraps or residue.
What should I do after installing the tint to ensure it stays in good condition?
Allow the tint to cure by avoiding rolling down the windows or washing the car for at least 48 hours. During this time, keep the windows rolled up and stay out of extreme heat or cold, which can affect the adhesion. After the curing period, clean the tinted windows with a soft cloth and a gentle, non-abrasive cleaner. Regular maintenance and gentle cleaning help preserve the appearance and effectiveness of the tint over time.
Final Thoughts
To install car window tint, gather all necessary tools like a squeegee, razor blade, and spray bottle. Clean the windows thoroughly to remove dirt and dust for a smooth application. Cut the tint film to the correct size before spraying a soapy water solution on the glass. Carefully peel off the backing and apply the tint, smoothing out bubbles as you go.
In conclusion, knowing how to install car window tint helps you achieve a professional look. Follow these simple steps, stay patient, and you’ll enjoy a sleek finish on your vehicle.


