To tint laminated glass effectively, start by cleaning the surface thoroughly, then apply a high-quality window film with smooth, even strokes, ensuring there are no air bubbles. Using a professional-grade tinting kit can make the process seamless and long-lasting. For a DIY project, patience and attention to detail are key to achieving a sleek, uniform look that enhances privacy and reduces glare.
Laminated glass can be tinted to improve privacy, control heat, and add aesthetic appeal. The process involves selecting the right type of film, cleaning the glass thoroughly, and carefully applying the tint to avoid bubbles or creases. Whether you’re upgrading your home or vehicle windows, understanding the proper steps can help you achieve a professional finish and enjoy the benefits of tinted laminated glass for years to come.
How to Tint Laminated Glass: A Complete Guide
Tinting laminated glass provides many benefits, such as reducing glare, blocking UV rays, and adding privacy. It also enhances the aesthetic appeal of windows and glass doors. Learning how to tint laminated glass correctly ensures a professional finish and durable results. This guide will walk you through the essential steps, tools, and tips to achieve perfect tinted laminated glass.
Understanding Laminated Glass and Its Tinted Options
Laminated glass consists of two or more layers of glass bonded together with a plastic interlayer, usually polyvinyl butyral (PVB). This design makes it strong and shatter-resistant. Tinting laminated glass can be done during manufacturing or added later as a film application.
Pre-tinted laminated glass options are available from manufacturers, offering various shades and colors. However, retrofitting existing laminated glass with tint film is a popular choice for customization. It allows you to control the degree of tint and style to match your needs.
Choosing the Right Tinting Method
There are primarily two ways to tint laminated glass: using pre-made tint films or applying spray-on tints. Each method has its own advantages and considerations.
- Tint Films: These are adhesive-backed films designed specifically for glass. They are available in different shades, reflective finishes, and colors. Films provide a clean, professional look and good durability.
- Spray-On Tints: These are liquid dyes or coatings sprayed directly onto the glass surface. They are more affordable but may require multiple coats and careful application to avoid streaks or bubbles.
Tools and Materials Needed
Before beginning the tinting process, gather all necessary tools and materials to ensure smooth workflow and optimal results.
- High-quality tint film or spray tint product
- Glass cleaner and lint-free cloths
- Utility knife or razor blade
- Plastic squeegee or hard card
- Spray bottles and water with a few drops of dish soap
- Masking tape
- Rubber gloves and safety glasses
- Measuring tape and marking tools
Preparing the Laminated Glass Surface
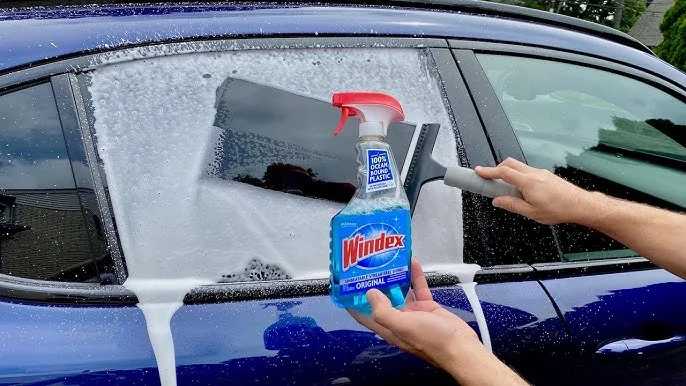
Proper preparation of the glass surface is crucial for successful tinting. Start by cleaning the glass thoroughly to remove dust, grease, and fingerprints. Use a glass cleaner and a lint-free cloth for a streak-free finish.
Ensure the glass is completely dry before proceeding. Any moisture or debris can cause bubbles or improper adhesion of the film or spray tint. If the glass has any scratches or imperfections, consider repairing them beforehand.
Applying Tint Films to Laminated Glass
Step 1: Measure and Cut the Film
Measure the dimensions of your glass accurately. Add an extra inch to each side for trimming. Cut the tint film using a utility knife or scissors, ensuring clean, straight edges.
Step 2: Prepare the Film
Spray the back of the film with a mixture of water and a few drops of dish soap. This allows you to reposition it during application. Remove the protective backing carefully, exposing the adhesive side.
Step 3: Position the Film
Spray the glass surface lightly with the soap solution. Carefully place the film onto the glass, starting from one edge. Use your hands or a squeegee to smooth out air bubbles and water, working from the center outward.
Step 4: Remove Bubbles and Excess Water
Use a plastic squeegee or a hard card to push out remaining air and water. Continue until the film is flat and free of bubbles. Trim any excess edges with a utility knife for a clean finish.
Applying Spray-On Tint to Laminated Glass
Step 1: Prepare the Spray Tint
Follow the manufacturer’s instructions carefully to mix or shake the spray tint. Wear rubber gloves and safety glasses to protect yourself from overspray and fumes.
Step 2: Protect Surroundings and Adjacent Areas
Use masking tape to cover edges, frames, and nearby surfaces to prevent overspray. Work in a well-ventilated area or outdoors for safety.
Step 3: Apply the Spray
Hold the spray bottle approximately 6-8 inches from the glass surface. Use even, sweeping motions to apply a light coat. Avoid drips or pooling, which can cause uneven coloring.
Step 4: Allow Drying and Repeat
Let the spray coat dry according to the product’s instructions. Apply additional coats if a darker tint is desired, allowing adequate drying time between coats.
Tips for Achieving Professional Results
Patience and attention to detail contribute greatly to a high-quality tint job. Here are some helpful tips:
- Work in a dust-free environment to prevent debris from settling on the wet film or spray.
- Use a steady hand and smooth, consistent strokes when applying spray tint.
- Always follow the manufacturer’s instructions for curing and drying times.
- Test a small area first to check adhesion and color before starting on the entire surface.
- For large or complex panes, consider seeking professional assistance to ensure precision.
Post-Application Care and Maintenance
Once the tinting process is complete, take care to preserve the finish. Avoid cleaning the tinted surface with abrasive materials or harsh chemicals. Instead, use a soft cloth and a mild glass cleaner.
Allow the tint to cure fully before exposing it to heavy moisture or cleaning. This might take up to 48 hours depending on the product used. Regular maintenance keeps the tint looking vibrant and prevents peeling or bubbling.
Additional Considerations for Tinted Laminated Glass
UV Protection and Heat Reduction
High-quality tint films can block up to 99% of UV rays, protecting interior furnishings and reducing skin exposure. They also help lower indoor temperatures by reflecting solar heat, leading to energy savings.
Safety and Security
The tinted layer can provide an added level of security by making glass less transparent and harder for intruders to see inside. It also maintains the laminated glass’s inherent shatter resistance, preserving safety during breakage.
Legal and Building Regulations
Always check local regulations regarding window tinting, especially for vehicles or commercial buildings. Some areas have restrictions on tint darkness or reflectivity levels.
Related Topics
- Different types of window tint films and their benefits
- How to remove old window tints safely
- Benefits of tinting for energy efficiency
- DIY vs. professional tinting: pros and cons
- Innovations in laminated glass and tinting technologies
Tinting laminated glass can be a straightforward process with the right preparation and tools. Whether you choose film application or spray-on tint, following these detailed steps will help ensure a smooth, professional-looking finish that enhances your windows’ appearance and function.
Exterior Film Installation for Laminated Glass
Frequently Asked Questions
What are the essential tools needed to tint laminated glass properly?
To tint laminated glass effectively, gather tools such as a high-quality squeegee, a utility knife or razor blade, a spray bottle filled with soapy water, clean microfiber cloths, and the tint film suitable for glass surfaces. These tools help in applying the film smoothly and ensuring a bubble-free finish.
How should the surface of laminated glass be prepared before tinting?
Start by cleaning the glass thoroughly with a mixture of water and a small amount of dish soap to remove any dirt, dust, or grease. Use a microfiber cloth to wipe the surface and avoid leaving streaks or lint. Make sure the glass is completely dry before applying the tint film to ensure it adheres properly.
What is the correct method for applying tint film to laminated glass?
Begin by cutting the tint film slightly larger than the size of the glass. Spray the glass with soapy water to help position the film. Peel the backing layer from the tint and carefully place it onto the wet surface, adjusting for alignment. Use a squeegee to press out air bubbles, starting from the center and working outward. Finally, trim any excess film with a utility knife.
How can I prevent air bubbles or creases when tinting laminated glass?
Ensure the glass is thoroughly cleaned and free of dust before applying the film. Use plenty of soapy water during installation to allow adjustments. Apply the tint slowly, smoothing out air bubbles with a squeegee as you go. If bubbles form, you can puncture them with a fine needle and smooth them out for a perfect finish.
What post-application care is necessary after tinting laminated glass?
Allow the tint film to set for at least 24 hours before cleaning. Avoid using harsh chemicals or abrasive materials that could damage the film. When cleaning, use a soft cloth and a mild glass cleaner to maintain the tint’s appearance and adhesion over time.
Final Thoughts
To tint laminated glass, start by cleaning the surface thoroughly to remove dirt and grease. Choose the right tint film compatible with laminated glass for durability and appearance. Apply the film carefully, ensuring there are no bubbles or wrinkles.
Finally, trim excess film and seal the edges for a neat finish. Knowing how to tint laminated glass helps you customize your windows effectively while maintaining safety. Follow these simple steps to achieve professional-looking results.


