To tint your car windows like a pro, start by thoroughly cleaning the glass, then carefully apply the film using a squeegee to avoid bubbles and creases. It’s a doable DIY project if you take your time and follow the right steps.
Applying window tint to your car can improve privacy, reduce glare, and enhance your vehicle’s look. To do it yourself, you’ll need the right tint film, cleaning supplies, a squeegee, and patience. Begin by cleaning the windows to remove any dirt and grease, then measure and cut the film to fit each window. Wet the glass with a soapy solution, peel off the backing of the tint, and carefully lay it on the window. Use a squeegee to smooth out bubbles and wrinkles, trimming excess film for a perfect finish. With careful attention, you can achieve a clean, professional look right in your driveway, saving money and gaining satisfaction from a job well done.
How to Do Car Window Tint: A Step-by-Step Guide
Applying window tint to your car can greatly improve comfort and privacy. It also adds a sleek look to your vehicle. Knowing how to do car window tint properly helps you avoid mistakes and get professional-looking results. Let’s explore this process in detail, covering everything from selecting the right film to finishing your tint job.
Understanding Car Window Tinting
Car window tinting involves applying a thin film to the inside of your vehicle’s windows. The film reduces sunlight glare, blocks harmful UV rays, and keeps your car cooler. There are different types of tint films, including dyed, metalized, carbon, and ceramic, each with unique benefits.
Choosing the correct film depends on your budget, desired appearance, and legal restrictions. Always research your local laws to avoid fines or the need to remove improperly applied tint. Clear understanding of the process ensures a smoother experience and a better finish.
Selecting the Right Window Tint Film
Start by selecting a film that matches your needs and complies with regulations. Dyed films are affordable and effective at reducing glare but may fade over time. Metalized films are more durable and reflect heat well but can interfere with electronic signals.
Carbon films offer a good balance of appearance and performance without signal interference. Ceramic films are the most advanced, providing excellent heat rejection and UV protection—though they are more costly. Consider these factors:
- Legal tint percentage limits in your state or country
- Desired level of heat rejection
- Your budget for the project
Gathering Your Supplies
Before starting, assemble all the necessary tools and materials to ensure a smooth process. Here’s a list of essentials:
| Tools & Materials | Description |
|---|---|
| Window tint film | Choose your preferred film based on your needs |
| Squeegee | Helps smooth out air bubbles and water |
| Spray bottle with soapy water | Lubricates the film for easier application |
| Utility knife or razor blade | For trimming excess film |
| Microfiber cloths | Clean glass and wipe surfaces |
| Heat gun or hairdryer | Helps conform film to curved surfaces |
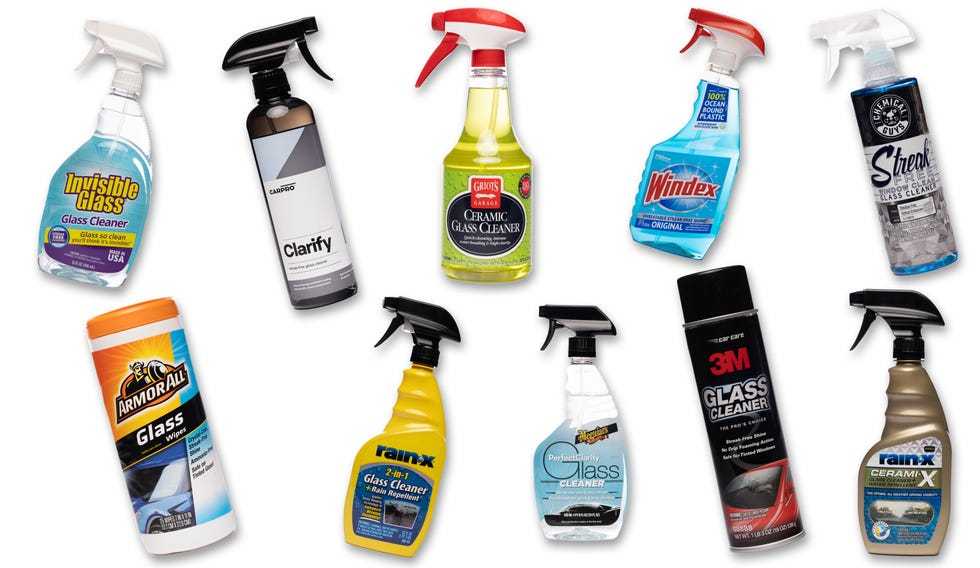
| Glass cleaner | Prepares windows for application |
| Gloves (optional) | Protects your hands from sharp edges and residues |
Preparing Your Car for tinting
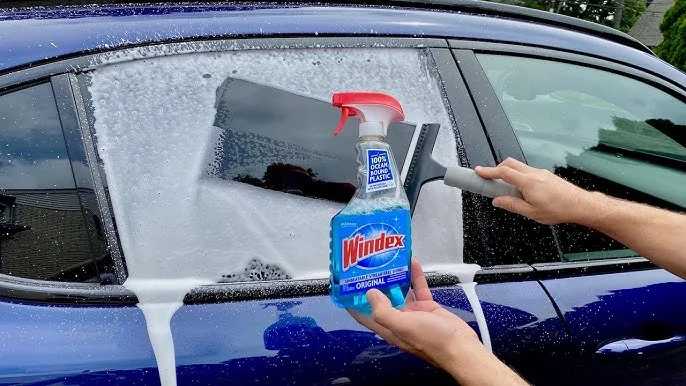
Proper preparation ensures the tint adheres well and lasts longer. Start by parking your vehicle in a shaded area to avoid direct sunlight during application. Next, thoroughly clean the windows using a glass cleaner and microfiber cloth.
Remove any dirt, grease, or old tint residues from the glass surface. Make sure to clean all corners and edges. Once clean, dry the surface completely to prevent water spots or bubbles later on.
Measuring and Cutting the Film
Measure your windows carefully to determine the size of the tint film required. Use a measuring tape or ruler for accuracy. Add an extra inch to each side to allow for trimming during installation.
Lay the film flat on a clean surface and cut it to the measured size using a utility knife. Cutting large sheets in advance simplifies the installation process. Be precise to prevent any gaps or overlaps once applied to the glass.
Applying the Window Tint Film
Spray the inside of the window generously with soapy water. This lubricant allows you to reposition the film as needed. Peel the backing layer from the tint film carefully, exposing the adhesive side.
Align the film with the top edge of the window, then slowly place it onto the glass. Use your hands or a squeegee to gently press the film onto the surface, starting from the center and working outward.
Removing Air Bubbles and Excess Water
As you apply the film, air bubbles and water can form underneath. Use a squeegee to push out trapped air and excess solution. Work in smooth, overlapping strokes from the center towards the edges.
If bubbles persist, poke a small pinhole to release trapped air and continue smoothing the film. This process helps your tint adhere flatly and reduces the risk of peeling later.
Trimming Excess Film
Once the film is in place, carefully trim around the edges of the window with a utility knife. Hold the blade at a slight angle and run it along the window’s perimeter for a clean finish. Be cautious not to scratch your car’s paint or glass.
This step ensures the tint looks professional and fits precisely on each window. Proceed slowly, checking your edges as you go.
Heating and Conforming the Tint
Use a heat gun or hairdryer to gently warm the film, especially on curved or intricate areas. Warmth makes the film more flexible and helps it conform smoothly to contours.
Apply heat in small sections, moving the heat source continuously. Be careful not to overheat, which could damage the film or glass. Carefully press and smooth the film as you apply heat for a flawless fit.
Final Inspection and Cleanup
After the tint is applied, inspect the windows for any remaining bubbles or wrinkles. Use the squeegee to gently push out any imperfections. Wipe down the edges and glass surfaces with a microfiber cloth to remove fingerprints and residue.
Allow the tint to cure undisturbed for at least 24 to 48 hours. Avoid rolling down windows or cleaning the film during this period to ensure optimal adhesion and durability.
Tips for a Perfect Tint Job
- Work in a dust-free, shaded environment to prevent debris from sticking to the film
- Take your time with each step for best results
- Use plenty of soapy water to assist with alignment and bubble removal
- Apply heat carefully to avoid damage, especially on curved surfaces
- Follow local laws regarding permissible tint darkness and reflectivity
Common Mistakes to Avoid
- Rushing the process can cause bubbles or uneven application
- Not cleaning the windows thoroughly results in trapping dirt under the film
- Applying tint in direct sunlight or high temperatures can cause the film to dry too fast and wrinkle
- Using a dull utility knife can cause jagged cuts and poor fit
Professional Help and DIY Considerations
While doing your own window tinting saves money, it requires patience and attention to detail. If you’re unsure or want a perfect finish, consider hiring a professional. Certification and experience ensure durability, compliance, and a high-quality look.
However, with the right tools, preparation, and patience, a DIY tint job can be rewarding. Just remember that practice makes perfect, and taking your time results in the best appearance.
Learning how to do car window tint successfully involves understanding the materials, preparing thoroughly, applying carefully, and finishing with patience. This step-by-step approach provides a clear path to achieving a sleek, effective tint on your vehicle, enhancing both comfort and style. Happy tinting!
Learn Tint in 60 seconds #windowtint #tint #tintingwindows #glass #cars #diy #diycrafts #walmart
Frequently Asked Questions
What supplies do I need to install car window tint at home?
You will need window tint film, a spray bottle filled with soapy water, a squeegee or plastic scraper, a utility knife or razor blade, microfiber cloths, and possibly a heat gun. Make sure to choose high-quality tint film suitable for automotive use to ensure durability and clarity. Preparing your workspace by cleaning the windows thoroughly helps achieve a smooth application.
How can I ensure the tint adheres smoothly without bubbles or creases?
Start by cleaning the window surface with a mixture of water and a few drops of dish soap, then dry it completely. Spray the soapy water generously onto the glass to allow for positioning the film. As you apply the tint, use the squeegee to press out air bubbles, working from the center outward. If bubbles form, gently lift the film and reapply, smoothing out as you go. Using a heat gun can help conform the tint to curved surfaces and remove stubborn creases.
What is the best method to cut the tint film precisely to fit my car windows?
Measure your window dimensions accurately and add a small margin for error. Lay the tint film over a clean, flat surface and trace the window outline with a fine marker or use masking tape as a guide. Cut along the markings with a sharp utility knife or razor blade, ensuring smooth, straight lines. Working slowly and carefully prevents damaging the film and helps achieve a professional look.
How long should I wait before rolling down the windows after installing tint?
Allow the tint to cure for at least 24 to 48 hours before rolling the windows down. This period helps the adhesive bond properly with the glass, preventing bubbles and peeling. Avoid washing the windows or exposing them to excessive moisture during this curing time for the best results.
Can I apply window tint to tinted existing windows?
Applying new tint over existing tint is possible but not always recommended. It can lead to bubbling or uneven adhesion if the underlying tint deteriorates or peels. Before proceeding, clean the existing tint thoroughly and check for any damage. If the old tint is in poor condition, removing it first ensures a clean surface for the new film, resulting in a better finish and longer-lasting results.
Final Thoughts
To do car window tint effectively, gather the necessary tools such as a squeegee, razor, and spray bottle. Clean the windows thoroughly to remove dirt and oil, ensuring a smooth surface. Spray water mixed with a few drops of dish soap onto the glass. Carefully peel the tint film and position it on the window, then use the squeegee to eliminate bubbles and excess water. Trim the edges for a perfect fit.
In conclusion, how to do car window tint involves proper preparation and careful application. Focus on cleanliness, precise placement, and smooth finishing. Follow these steps to achieve a professional look.


