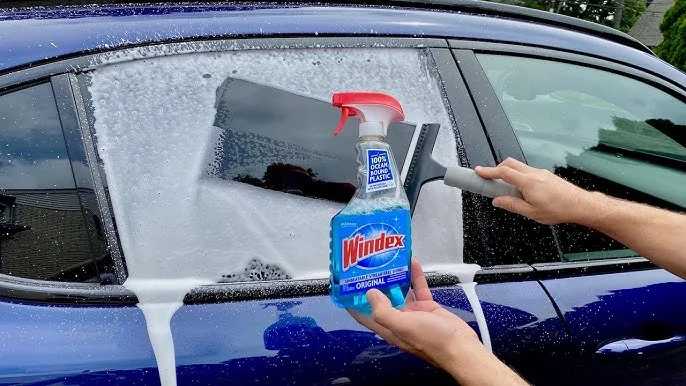
If your car window tint has bubbles, peeling, or scratches, don’t worry—quick fixes can restore its sleek look. Start by thoroughly cleaning the tinted window, then carefully remove the damaged tint using a heat gun and a razor blade, and finally replace it with a new tint applied smoothly with a squeegee. This simple approach can save you money and time, keeping your vehicle looking sharp.
To fix car window tint, you’ll need to assess the damage, remove the old tint carefully, and reapply a new layer properly to ensure a smooth and durable finish. Regular maintenance and proper installation are key to preventing future issues, so understanding the process can help you maintain that cool, sleek look for your vehicle.
Getting your car window tint to look perfect again might sound daunting, but with the right tools and a bit of patience, it’s entirely doable. Whether your tint has started to bubble, peel, or scratch, addressing these problems promptly can extend its lifespan. The process involves removing the damaged tint without harming the glass, then carefully applying a fresh, even layer for a polished appearance. This DIY solution is ideal for car owners wanting to save costs while maintaining a stylish, functional window tint. Plus, knowing how to fix your tint empowers you to keep your vehicle looking sharp without relying solely on professionals.
How to Fix Car Window Tint: A Complete Guide
Understanding Why Car Window Tint Fades or Gets Damaged
Car window tint can fade or peel over time due to several factors. Exposure to sunlight, harsh weather, and poor installation all contribute to damage. Recognizing early signs helps you decide whether to fix or replace the tint.
Common Causes of Tint Damage
- UV Sunlight: The sun’s ultraviolet rays break down the tint film over time.
- Scratches and Physical Damage: Sharp objects or frequent cleaning can scratch the film.
- Poor Installation: Improper application causes bubbling or peeling.
- Chemical Damage: Harsh cleaning agents can weaken the tint.
Assessing the Damage Before Fixing
Before deciding on repairs, inspect the affected window closely. Look for bubbling, peeling, discoloration, or scratches. Determine if the damage is localized or spread out, as this affects your repair options.
When Is Repair Possible?
If the damage is minor, such as small bubbles or light scratches, repair may be feasible. Large areas of peeling or major bubbling often require complete removal and reapplication.
Tools Needed for Inspection
- Flashlight: To check for bubbles and peeling in low light.
- Magnifying glass: To examine scratches and small damages.
- Mirror: To view the tint from inside and outside the vehicle.
Preparing to Fix Car Window Tint
Proper preparation ensures a successful repair. Gather all necessary tools and materials before starting.
Equipment Required
- Cleaning supplies: Isopropyl alcohol, microfiber cloths, and soap.
- Replacement tint film: Matching the original tint shade and size.
- Application tools: Squeegee, razor blade, and spray bottles.
- Sticky tape: To hold excess film temporarily.
- Heat gun or hairdryer: To help smooth the film and remove bubbles.
Steps to Prepare Your Vehicle
- Park your car in a shaded, dust-free area.
- Clean the window thoroughly, removing dirt, grease, and old adhesive residues.
- Ensure the window surface is dry before application.
- Wear gloves to prevent fingerprints on the film.
Fixing Small Bubbles and Wrinkles in Car Window Tint
Bubbles happen when air gets trapped under the tint film. Wrinkles are caused by improper application or uneven surfaces.
Step-by-Step Process to Eliminate Bubbles
- Use a needle or pin to gently prick the bubble’s center.
- Apply a few drops of soapy water with a spray bottle directly onto the area.
- Gently push the trapped air toward the pinhole using a squeegee or credit card wrapped in a microfiber cloth.
- Wipe away excess water afterward and let it dry.
Fixing Wrinkles or Creases
If wrinkles are superficial, applying gentle heat with a heat gun or hairdryer can help smooth the film. Carefully warm the area and flatten the film with a squeegee.
Replacing Damaged or Peeling Tint
Severe damage like peeling or large bubbles usually means you need to remove and replace the tint.
How to Remove Old Window Tint
- Spray a mixture of water and a few drops of dish soap on the window.
- Use a razor blade carefully to lift the edge of the film.
- Slowly peel the tint film from the glass, pulling steadily to avoid cracks.
- Clean the surface thoroughly afterward to remove adhesive residues.
Applying New Tint Film
Once the surface is clean:
- Cut the new tint film to size, leaving a small margin around the edges.
- Spray the window with a soapy water solution to prevent sticking during placement.
- Lay the film onto the window, adjusting for perfect fit.
- Use a squeegee to press out water and air bubbles, working from the center outward.
- Trim edges carefully with a razor blade for a clean finish.
- Allow the tint to cure for at least 24 hours without touching or rolling down the windows.
Tips for a Professional-Looking Fix
Achieving a clean, professional repair involves patience and attention to detail. Always work in a dust-free environment to prevent debris from getting trapped.
Additional Advice
- Work on a warm, dry day for better adhesion.
- Follow the manufacturer’s instructions for the specific tint film used.
- Use a spray bottle with a mixture of water and a few drops of dish soap during application to facilitate positioning.
- Take your time and smooth out bubbles as you go.
Related Topics for Better Results
How to Extend the Life of Car Window Tint
Proper maintenance, including gentle cleaning and avoiding abrasive materials, can prolong the life of the tint.
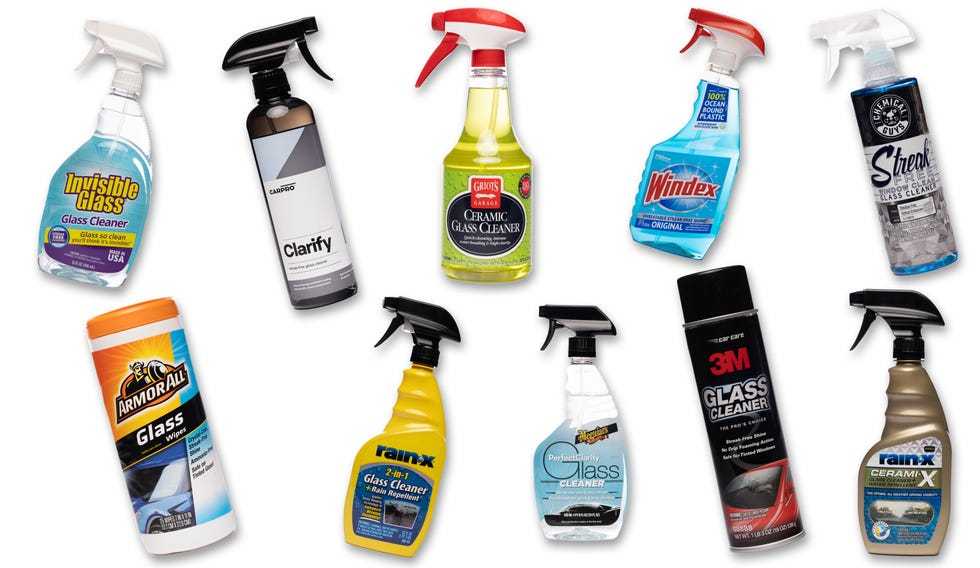
Best Cleaning Products for Car Windows
Use mild, ammonia-free cleaners and soft microfiber cloths. Avoid alcohol-based solutions that can damage the film.
When to Seek Professional Help
If damage is extensive or if you’re unsure about doing it yourself, professional tint repair or replacement is a good idea to ensure quality work.
Fixing car window tint can be simple if you understand the problem and have the right tools. Small bubbles and scratches are usually easy to repair, but large peeling areas may need professional help. Always work carefully and patient for the best results. Proper maintenance and timely repairs will keep your tint looking good and functioning well longer.
Learn Tint in 60 seconds #windowtint #tint #tintingwindows #glass #cars #diy #diycrafts #walmart
Frequently Asked Questions
What steps should I take to fix a bubbling car window tint?
To fix bubbling window tint, start by cleaning the affected area with a glass cleaner and a lint-free cloth. Carefully puncture the bubbles with a pin to release trapped air or moisture. Once the bubbles are released, use a squeegee or a credit card to smooth out the tint, pushing the air toward the punctures. If the bubbles are stubborn or large, consider applying a small amount of heat with a heat gun to help the adhesive bond better. Always work gently to avoid damaging the tint or the glass.
How can I reattach a peeling section of window tint?
Reattaching a peeling section involves cleaning the area thoroughly with alcohol-based cleaner to remove dirt and oils. Use a specialized tint adhesive or a clear, skin-safe glue to reattach the loose section, applying it carefully with a small brush or applicator. Press down firmly to ensure good contact with the glass and smooth out any wrinkles or air pockets with a squeegee. Allow the adhesive to cure as per the product instructions before rolling the window up or down.
What is the best way to remove and replace a damaged part of the tint?
Start by gently peeling back the damaged area of the tint from the edges, applying heat with a heat gun to loosen the adhesive if necessary. Carefully peel off the damaged section without pulling on the surrounding tint. Clean the glass thoroughly afterward to remove any residual adhesive. Cut a new piece of tint film slightly larger than the damaged area and apply it using a wet application solution to position it accurately. Use a squeegee to remove air bubbles and ensure a smooth, even surface. Allow the new tint to set fully before rolling down the window.
How do I prevent future issues with my car window tint?
To prevent future problems, avoid rolling down your windows for a few days after tint installation to ensure proper adhesion. Park your car in shaded areas to reduce heat exposure that can cause bubbling or peeling. Regularly clean the tint with a soft cloth and a cleaner suitable for tinted windows to prevent dirt buildup. Also, avoid using abrasive cleaners or brushes that can scratch or damage the tint. Proper maintenance extends the life of your window tint and keeps it looking clean and smooth.
Final Thoughts
To fix car window tint effectively, start by cleaning the damaged area thoroughly. Use a gentle soap and water to remove dirt and grease. Next, carefully cut a new piece of tint film to fit the window. Apply the film smoothly, removing any air bubbles with a squeegee or credit card.
Ensure the edges are sealed well to prevent peeling. For small scratches or bubbles, light sanding or reapplication can help. Always follow the manufacturer’s instructions for best results.
In conclusion, how to fix car window tint becomes manageable by cleaning, trimming, and sealing properly. Careful attention to detail ensures a durable, professional-looking finish.


