To tint your car windows quickly and affordably, consider applying DIY window tint film using a few simple tools and careful technique. First, clean the glass thoroughly, then cut the tint film to size, apply it with a spray of soapy water, and use a squeegee to remove bubbles. Finish by trimming excess film and letting it set for a few days.
Tinting your car glass enhances privacy, reduces glare, and keeps the interior cooler. Doing it yourself is a cost-effective alternative to professional jobs, provided you follow the proper steps for a smooth, lasting finish. With patience and attention to detail, you can achieve a sleek look that transforms your ride.
Getting your car windows tinted doesn’t have to be complicated or expensive. Whether you’re looking to block out harsh sunlight or simply upgrade your vehicle’s style, the process involves a few straightforward steps. Start by selecting the right tint film, then carefully prepare the glass surface. After that, apply the film using a spray of soapy water to position it correctly, and use a squeegee to eliminate air bubbles. Finish by trimming the edges and allowing the film to settle. This simple DIY approach can give your car a fresh, customized look without the need for professional help.
How to Make Car Glass Tinted: A Complete Guide
Understanding Car Glass Tinting
Tinting your car glass involves applying a thin film of colored material to your windows. This process can make your vehicle look sleek and stylish while providing practical benefits. Many car owners choose tinting to reduce glare, block UV rays, and increase privacy.
Types of Car Window Tints
There are different kinds of window tint films available on the market. Each type offers unique advantages depending on your needs and budget. The main types include:
- Dyed Tint Films: Cost-effective and good for reducing heat and glare. However, they may fade over time.
- Metalized Films: Offer better durability and UV protection. They contain metal particles that reflect heat.
- Carbon Films: Provide excellent UV protection and do not interfere with electronic signals.
- Ceramic Films: Top-of-the-line options that give the best heat rejection and UV blocking without signal interference.
Legal Regulations for Car Tinting
Before starting, learn about your local tinting laws. Regulations specify the maximum allowable tint darkness and reflectivity levels for front and rear windows. Ignoring these rules can result in fines or needing to remove the tint.
Tools and Materials Needed
To tint your car glass, gather the following tools:
- Window tint film of your preferred type and shade
- Spray bottle filled with water and a few drops of dish soap
- Utility knife or razor blade
- Squeegee or plastic card
- Microfiber cloths
- Heat gun or hairdryer (optional but helpful)
- Measuring tape and marker
Step-by-Step Process to Tint Car Glass
1. Prepare Your Workspace
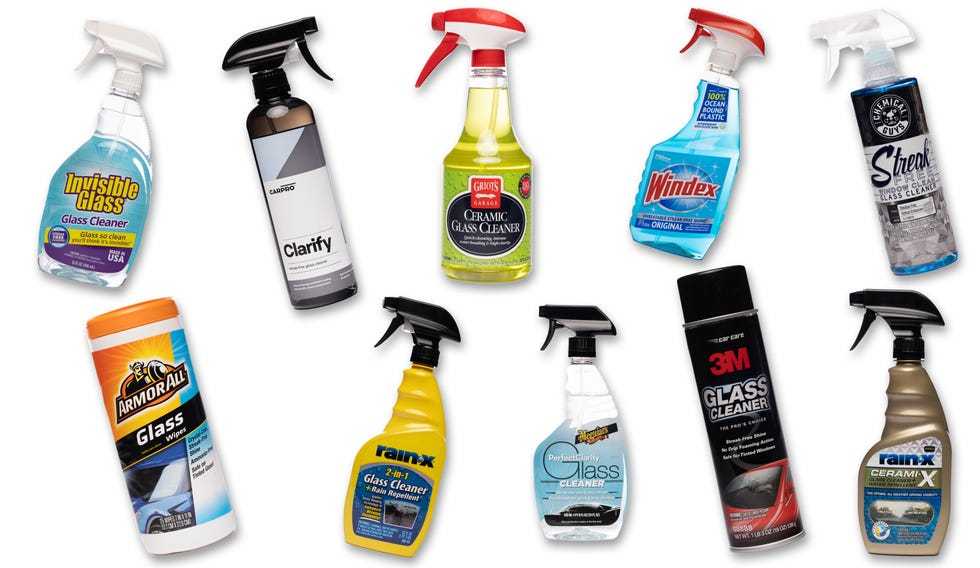
Choose a clean, dust-free, shaded area to work on your car. Make sure the temperature is moderate to prevent the film from shrinking or sticking prematurely. Clean all windows thoroughly with a microfiber cloth and glass cleaner.
2. Measure and Cut the Tint Film
Use the measuring tape to determine the size of each window. Add a small margin for adjustments. Cut the tint film slightly larger than the window dimensions for easier handling. Always measure twice to avoid mistakes.
3. Wet the Window Surface
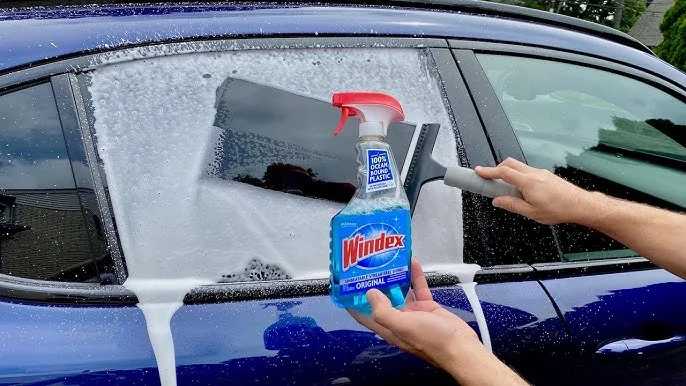
Spray the window with the soap water mixture generously. This helps the film slide into position and prevents it from sticking immediately. Spray the backside of the tint film as well.
4. Apply the Tint Film
Carefully peel off the protective backing from the film. Place the wetted film onto the glass, aligning it with the edges. Use your squeegee or plastic card to smooth out bubbles and excess water from the center outward.
5. Remove Bubbles and Excess Water
Work slowly, pushing out any air bubbles and water. Use a microfiber cloth to wipe around the edges. For stubborn bubbles, gently poke with a pin and smooth out with the squeegee.
6. Trim Excess Film
Once the film is flat and smooth, use a utility knife or razor blade to trim along the edges of the window carefully. Make sure to follow the contours of the glass precisely.
7. Dry and Set the Film
Allow the film to dry for at least 24 hours. Avoid rolling down the windows during this period. Using a heat gun can help secure the film and improve adherence, but use it cautiously to prevent damage.
Tips for a Perfect Tint Job
– Always follow the manufacturer’s instructions for your specific tint film.
– Work in a dust-free environment to prevent particles from getting trapped under the film.
– Take your time to ensure edges are clean and aligned properly.
– Use a steady hand when trimming for a professional appearance.
– Consider consulting a professional if you’re unsure about doing the job yourself.
Advantages of DIY Car Tinting
Tinting your car glass at home can save money and give you a sense of accomplishment. It allows you to choose the perfect tint shade and style suited to your preferences. Plus, it’s a satisfying project that can be completed over a weekend.
Common Challenges and How to Overcome Them
Applying tint film can be tricky if you’re new to it. Bubbles and creases are common issues but can be minimized with patience. Always keep the film wet during application to allow repositioning, and work slowly.
Professional vs. DIY Tinting
Professional tinting offers a flawless finish and quick results but can be costly. DIY tinting is budget-friendly and customizable but requires patience and attention to detail. Weigh these options based on your skills and budget.
Maintenance and Care for Tinted Windows
To keep your tint looking new, avoid cleaning windows for at least a week after installation. Use gentle glass cleaners and soft cloths. Avoid abrasive materials that can scratch or peel the film.
Final Thoughts on Making Car Glass Tinted
Tinting your car windows can be a rewarding experience that improves your vehicle’s look and comfort. Proper preparation, patience, and the right tools ensure a professional-looking finish. Whether you choose to do it yourself or hire a professional, understanding the process helps achieve the best results.
Learn Tint in 60 seconds #windowtint #tint #tintingwindows #glass #cars #diy #diycrafts #walmart
Frequently Asked Questions
What are the best tools needed to tint a car window at home?
To tint a car window at home, you will need a high-quality window tint film, a spray bottle filled with a mixture of water and a few drops of dish soap, a utility knife or razor blade, a squeegee or tinting card, a clean microfiber cloth, and masking tape. Using these tools properly ensures a smooth application and minimizes bubbles or creases in the tint.
How can I prepare my car windows before applying tint?
Start by thoroughly cleaning the windows with glass cleaner and a lint-free cloth to remove any dust, dirt, or grease. Once clean, dry the surface completely. Use masking tape to mark the areas where you plan to cut the tint film, and ensure the window surface is completely dry before starting the application process. Proper preparation helps the tint adhere better and reduces imperfections.
What steps should I follow to apply tint film without creating bubbles?
Begin by spraying the inside of the window with the soapy water mixture to allow the tint film to slide into position. Peel off the backing of the tint film carefully, then place the film on the window, starting from the top. Use your squeegee to gently press the film from the center outward, removing any air bubbles and excess water. Keep the film moist during application to facilitate repositioning if necessary. Finish by trimming any excess tint along the edges with a utility knife.
How do I ensure the tint adheres properly over time?
After applying the tint, keep the windows rolled up for at least 24 hours to allow the adhesive to set. Avoid rolling down the windows during this period. Keep the surface dry; do not wash the car or expose it to rain within the first few days. Using a clean, soft cloth to gently wipe the surface can help maintain clarity and adhesion. Properly curing the tint ensures long-lasting, professional results.
Are there any safety tips I should follow during the tinting process?
Work in a clean, dust-free environment to prevent dirt from getting trapped under the tint. Wear gloves to avoid fingerprints on the film and to protect your hands from sharp tools. Take your time during application to ensure precise placement. Carefully handle cutting tools to avoid injury, and always dispose of used razor blades safely. Following safety precautions ensures a smooth, safe tinting process and high-quality results.
Final Thoughts
To make car glass tinted, start by selecting the appropriate tint film for your vehicle. Clean the windows thoroughly to ensure a smooth application. Apply the film carefully, using a squeegee to remove air bubbles.
In conclusion, how to make car glass tinted involves proper preparation, accurate application, and patience. Follow these steps precisely, and you’ll achieve a professional-looking tint.


