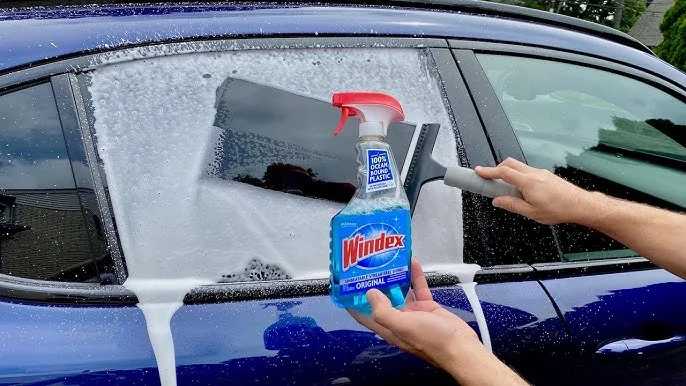
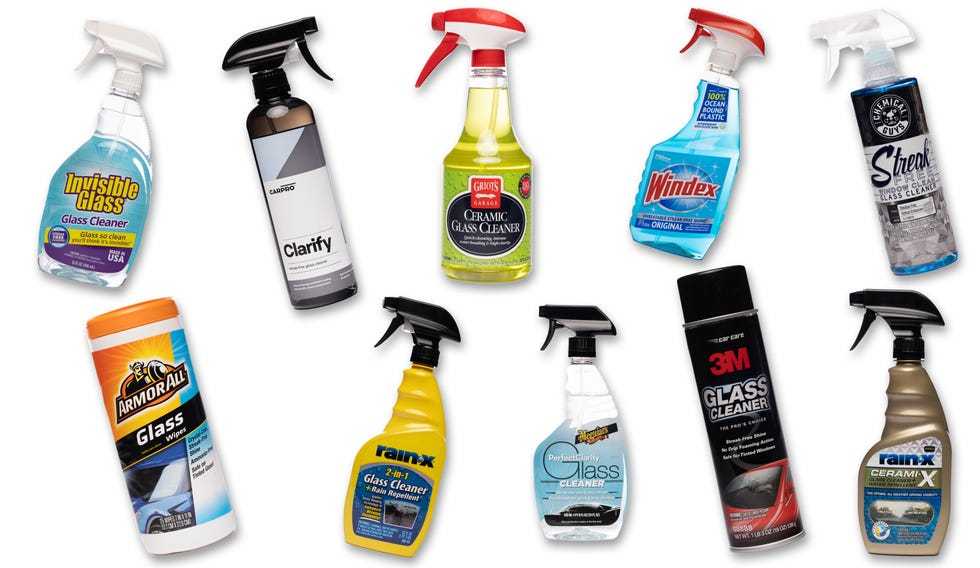
To quickly restore your automotive glass to its crystal-clear condition, start by cleaning it thoroughly with a gentle glass cleaner and a soft cloth, then use a polishing compound to buff out scratches and imperfections. For stubborn haziness or minor scratches, a dedicated glass polish can make a big difference, leaving your windshield or windows looking pristine and transparent.
Polishing automotive glass is a simple yet effective way to improve visibility and the overall appearance of your vehicle. Over time, dirt, grime, and small scratches can obscure your view and dull the glass’s shine. Fortunately, with a few basic supplies and some patience, you can restore your car’s glass to near-original clarity at home. The key is to understand the right products to use and follow a proper polishing process, ensuring safe driving and a more polished look for your vehicle.
How to Polish Automotive Glass: A Complete Guide
Polishing automotive glass is an excellent way to keep your vehicle looking clear and new. Whether you have minor scratches or haziness, proper polishing can restore transparency and improve safety. In this guide, we will explore the essential steps and techniques for effectively polishing your car’s glass.
Understanding Why Automotive Glass Needs Polishing
Over time, dirt, debris, and environmental factors cause glass to become cloudy or scratched. Sun exposure can also deteriorate the surface, leading to a dull appearance. Regular polishing removes surface imperfections, maintaining clarity and enhancing driving safety.
Clear glass ensures better visibility, especially during adverse weather, making polishing a vital part of car maintenance. It also extends the lifespan of your windshield and windows, saving you money on replacements.
Types of Damage in Automotive Glass
Knowing the different types of damage helps determine the best polishing method. Common issues include scratches, water spots, and minor haziness. Severe cracks require professional repairs and may not respond well to polishing.
- Surface Scratches: Light or deep scratches caused by debris or improper cleaning.
- Water Spots: Mineral deposits that create haziness.
- Oxidation: Loss of clarity due to UV damage and aging.
Identifying the damage type guides your choice of polishing products and techniques.
Gathering the Right Tools and Materials
Before starting, assemble all necessary tools to ensure a smooth process. Using quality materials results in better polishing outcomes and prevents further damage.
| Tools/Materials | Description |
|---|---|
| Automotive Glass Polish | Specially formulated to remove scratches and haziness |
| Polishing Pads or Rags | Soft, non-abrasive pads or microfiber cloths for applying polish |
| Sandpaper (if needed) | Finer grits for deep scratches, used cautiously |
| Electric Buffer or Rotary Tool | Provides controlled polishing power, but requires skill |
| Water and Cleaning Solution | For cleaning the glass surface beforehand |
| Masking Tape | Protects surrounding areas from accidental scratches |
Preparing the Glass Surface
Proper preparation is key to achieving a smooth, polished finish. Begin by cleaning the windshield thoroughly with soap and water to remove dirt and grime.
After cleaning, use a clean cloth to dry the surface completely. For stubborn spots, apply a glass cleaner or vinegar solution and wipe with a microfiber cloth for a streak-free finish.
To protect areas around the glass, apply masking tape along edges, especially if using power tools. This prevents accidental scratches or damage to rubber trims and paint.
Step-by-Step Process for Polishing Automotive Glass
1. Assess the Damage
Inspect the glass carefully to determine the severity of scratches or haziness. For minor scratches, hand polishing often suffices. Deep scratches might require additional steps or professional help.
2. Choose the Appropriate Polish and Technique
Select a polish designed for automotive glass, ensuring it matches your specific needs. Light haziness can be handled with a softer polish, while deep scratches may require a more abrasive compound.
Use a small amount of polish on a clean polishing pad or microfiber cloth. Avoid over-applying, which can create new scratches or streaks.
3. Apply the Polish to the Glass
Spread the polish evenly across the surface using circular motions. Apply gentle but consistent pressure to help the polish work into scratches and surface imperfections.
Work in small sections, so you maintain control and ensure thorough coverage. Reapply polish as needed, but avoid excess buildup.
4. Use an Electric Buffer for Better Results
If available and used properly, an electric buffer can significantly improve the polishing process. Use a soft pad attachment to avoid scratching the glass surface.
Operate the buffer at a low speed, moving it in circular motions. Keep it in motion to prevent overheating or uneven polishing.
5. Wipe and Inspect
After polishing, use a clean microfiber cloth to wipe away any residue. Inspect the glass carefully to assess the progress.
If scratches are still visible, repeat the process. For stubborn marks, consider using a finer polish or professional-grade products.
Additional Polishing Tips and Tricks
Patience is essential—allow each layer of polish to work before applying more. Over-polishing can lead to surface damage or hazing.
Work in well-lit areas to see the results clearly. A good light source helps identify areas needing extra attention.
Always follow the manufacturer’s instructions on polishing products to avoid unintended damage.
Safety Precautions During Polishing
Wear protective gloves and eyewear to shield against splashes and debris. Working in a well-ventilated space prevents inhaling fumes from chemical products.
Be cautious with power tools—keep the buffer moving to prevent uneven wear or heat buildup that could crack the glass.
Ensure all protective gear is used properly to maintain safety throughout the process.
Post-Polishing Care and Maintenance
After polishing, clean the glass with a high-quality glass cleaner to remove any residual polish or dirt. Regular cleaning helps prolong the clarity achieved through polishing.
Apply a protective glass coating or sealant to shield against future dirt, water spots, and UV damage. These products create a barrier, making future cleaning easier.
Routine inspections and timely polishing can prevent deeper scratches and maintain your vehicle’s appearance for years to come.
Related Topics to Explore
- Best tools for automotive glass polishing
- How to remove stubborn water spots from car windows
- DIY vs professional glass repair and polishing
- Effective cleaning methods for car windshield maintenance
- Choosing the right glass sealants and coatings for your vehicle
Polishing automotive glass might seem complex at first, but with the right tools and techniques, you can achieve professional-looking results at home. Regular maintenance not only keeps your vehicle looking great but also improves safety during your drives. Take your time, follow each step carefully, and enjoy a clearer, more polished ride every day.
HOW TO POLISH AND CERAMIC COAT CAR GLASS !!
Frequently Asked Questions
What cleaning agents are suitable for preparing automotive glass before polishing?
Use a gentle glass cleaner or a mixture of water and a small amount of dish soap to remove dirt, grease, and debris from the glass surface. Avoid harsh chemicals or abrasive cleaners that can scratch the glass. Make sure to thoroughly wipe the surface with a clean microfiber cloth to ensure it is free of residues before moving on to polishing.
How can I effectively remove minor scratches from automotive glass?
Apply a specialized glass polishing compound using a soft cloth or a polishing pad. Gently work the compound into the scratches with small, circular motions. Continue polishing until the scratches diminish or become less visible. After polishing, clean the area with a damp cloth to remove any residual compound and assess the results. Repeat the process if necessary for deeper scratches.
What techniques help in achieving a streak-free finish on automotive glass?
Use a high-quality microfiber cloth to apply and wipe off polishing products. Work in small sections and utilize circular or back-and-forth motions to ensure even coverage. After polishing, buff the glass with a clean, dry microfiber cloth to remove any remaining residue. Proper lighting helps identify streaks so you can address them promptly, ensuring a clear and polished surface.
Are there specific tools recommended for polishing automotive glass effectively?
Yes, a rotary or dual-action polisher combined with foam or microfiber polishing pads enhances the polishing process. Hand polishing can work for small areas, but power tools provide more even pressure and better results. Always choose a pad appropriate for glass polishing and keep the tools at a low to medium speed to prevent damage.
How often should I polish my automotive glass to maintain clarity?
Typically, polish your automotive glass every 6 to 12 months, depending on exposure to environmental elements like dirt, debris, and weather conditions. Regular cleaning helps prevent the buildup of contaminants and keeps the glass looking clear. If you notice scratches or cloudiness, consider polishing sooner to restore visibility and maintain a neat appearance.
Final Thoughts
To polish automotive glass effectively, start by cleaning the surface thoroughly with a glass cleaner to remove dirt and debris. Use a fine polishing compound and a soft cloth or polishing pad to gently buff the glass in circular motions. Rinse with clean water and dry with a lint-free cloth for a clear finish.
In conclusion, knowing how to polish automotive glass can significantly improve your vehicle’s appearance and safety. Proper technique and materials produce a smooth, streak-free shine. Follow these simple steps to achieve professional-quality results efficiently.


