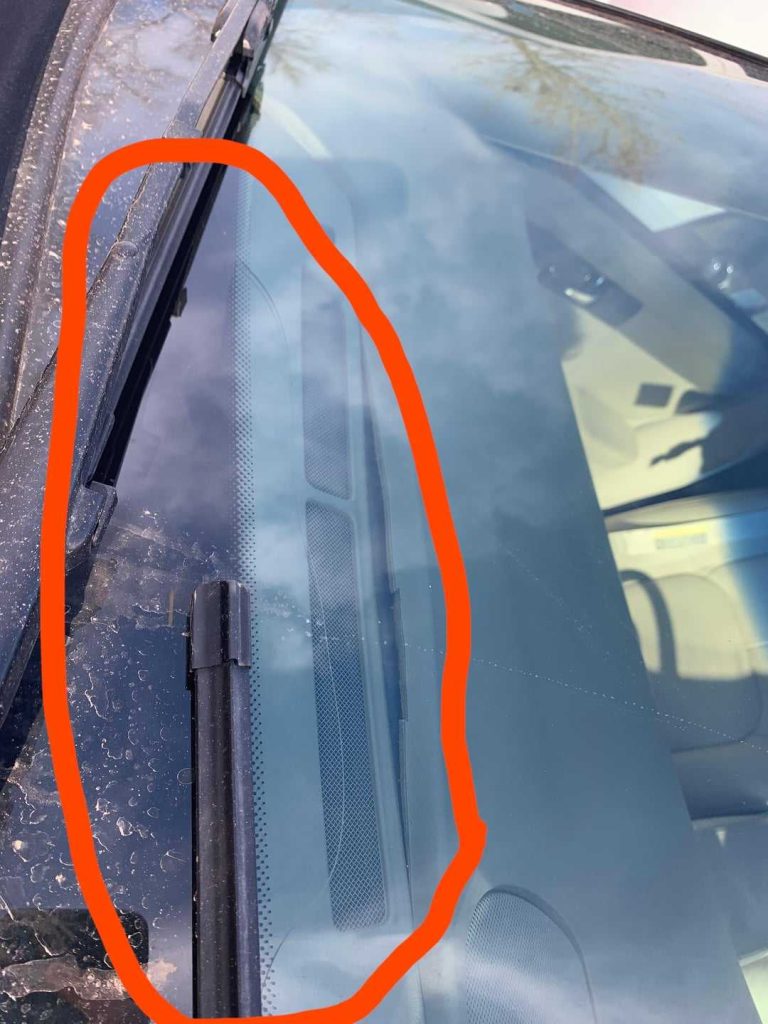
To fix a windshield leak quickly, identify the source of the leak, clean the area thoroughly, and apply a high-quality windshield sealant or adhesive. For minor leaks, resealing around the edges or replacing damaged weatherstripping often does the trick. If the leak persists or is caused by a cracked windshield, consulting a professional for repair or replacement is best.
A leaking windshield can be a real headache, but with a few simple steps, you can often stop the leak yourself. First, pinpoint where the water is entering—often around the edges or through cracks. Clean the area well and apply a specialized windshield sealant to create a waterproof barrier. For more severe damage or persistent leaks, it’s wise to seek professional help to ensure a proper fix. Addressing the issue promptly can prevent further damage and keep your vehicle dry and comfortable. Whether it’s a tiny crack or a worn seal, quick action can save you time and money in the long run.
How to Repair Windshield Leak: A Complete Guide
Understanding the Causes of Windshield Leaks
A windshield leak happens when water enters your vehicle through cracks, gaps, or damaged seals around the windshield. Common causes include aging sealant, improper installation, or physical damage like cracks or chips. Identifying the root cause is the first step before attempting repairs.
Signs That Indicate a Windshield Leak
You might notice water spots on your dashboard or seats after rain or car washes. Foggy or damp interior areas, musty odors, or visible water streaks are clear indicators. Recognizing these signs early helps prevent further damage to your vehicle’s interior.
Gathering the Necessary Tools and Materials
Before starting, ensure you have all tools ready. These include:
- Sealant or windshield adhesive suitable for automotive use
- Cleaning supplies like glass cleaner and microfiber cloths
- Suction cups or clamps for support
- Utility tool to remove old sealant or adhesive
- Protective gloves and eye protection
Having these items prepared helps make the repair smoother and more effective.
Preparation Steps Before Repairing
Start by parking in a dry, shaded area. Clean the windshield thoroughly to remove dirt, grime, and old sealant residues. Dry the area completely to ensure proper adhesion of new sealant. Removing any debris around the edges reduces the risk of dirt getting trapped under the sealant.
Assessing the Type of Leak
Determine if the leak stems from cracks, sealant failure, or gaps in the frame. Use a flashlight to check for visible gaps or broken seals. For small cracks, repairing may suffice; larger damages could require professional replacement.
Cleaning and Preparing the Damage Area
Use a glass cleaner and soft cloth to clean the area around the leak thoroughly. Remove any loose particles or old sealant with a utility tool. Proper cleaning ensures the new sealant bonds effectively and prevents future leaks.
Applying Sealant or Windshield Adhesive
Apply the sealant evenly along the edges of the windshield or crack. Follow the manufacturer’s instructions regarding curing time and application technique. Use a utility tool or your finger to smooth the sealant for a tight seal. Avoid over-application, which can cause excess that might impair visibility.
Special Tips for Sealant Application
- Work in a clean environment to prevent debris from contaminating the sealant
- Wear gloves to avoid getting sealant on your skin
- Use masking tape to create clean lines when applying sealant for a professional look
Sealing and Drying Time Guidelines
Allow the sealant to cure as per the manufacturer’s instructions, which is typically between 24 to 48 hours. During this time, keep the area dry and avoid washing the vehicle. Proper curing is crucial for a long-lasting, waterproof seal.
Testing the Effectiveness of the Repair
After the sealant has dried, test for leaks by lightly spraying water over the windshield edge or pouring a small amount of water with a hose. Check inside for any signs of water seepage. If the area remains dry, your repair is successful.
When to Seek Professional Help
Some leaks are too complex for DIY repairs, especially if they involve large cracks, extensive sealant failure, or structural damage. In such cases, consult a professional auto glass technician who can perform a thorough inspection and provide a durable solution.
Preventative Maintenance Tips
Regularly inspect your windshield for chips or cracks and address them promptly. Use high-quality sealant during windshield replacement and avoid aggressive washing to prolong the lifespan of your sealant. Parking in shaded areas also helps prevent sealant degradation caused by UV exposure.
Additional Repair Methods
Besides sealant application, there are other ways to fix windshield leaks:
- Replacing damaged or worn-out weatherstripping
- Re-sealing the windshield with a professional adhesive if the current sealant fails
- Replacing the entire windshield if the damage is extensive
Each method depends on the severity of the leak and the extent of damage.
Understanding the Cost of Repair
DIY repairs with sealant typically cost less—usually between $20 to $50 for materials. Professional repairs or replacements can range from $100 to over $400, depending on the vehicle make and extent of damage. Weigh the pros and cons to determine the best option for your situation.
Safety Precautions During Repair
Always wear protective gloves and eye protection when working with chemicals. Work in a well-ventilated area to avoid inhaling fumes. Carefully handle sharp tools to prevent injuries during removal of old sealant or cracked glass.
Common Mistakes to Avoid
Avoid applying sealant in wet conditions or in direct sunlight, which can impair adhesion. Do not rush the curing process—patience ensures a more durable seal. Also, avoid over-tightening clamps or using excess sealant, as this might cause further damage.
Additional Resources and Support
Consult your vehicle’s owner manual for manufacturer-specific instructions. Watch online tutorials to see step-by-step repair demonstrations. When in doubt, contact a local auto glass specialist for advice or professional assistance.
Related Topics for Further Reading
- How to replace a cracked windshield
- Best windshield sealants for DIY repairs
- Understanding windshield warranties and coverage
- Tips for maintaining your vehicle’s glass integrity
By following these detailed steps, you can effectively repair a windshield leak and prevent future issues. Proper maintenance and timely repairs help keep your vehicle dry and safe, saving you money and avoiding more costly repairs down the line.
How To Repair A Leaking Windshield (Andy’s Garage: Episode – 84)
Frequently Asked Questions
What are the best methods to seal a leaking windshield temporarily before professional repair?
To temporarily seal a windshield leak, clean the affected area thoroughly to remove dirt and debris. Apply a waterproof sealant or clear tape over the crack or gap to prevent water from entering. Avoid driving in heavy rain until you can get a professional repair, as this helps prevent further damage and keeps the interior dry.
How can I identify the source of a windshield leak effectively?
Inspect the interior of your vehicle for signs of water spots, mold, or dampness on the dashboard or seats. On the exterior, look for visible cracks, chips, or gaps along the edges of the windshield. Use a hose to gently spray water around the edges while someone observes inside to pinpoint where water enters, helping you locate the precise leak source.
What professional repair options are available for a leaking windshield?
A professional can perform a variety of repairs depending on the severity of the leak. Small cracks or chips can often be fixed with windshield resin injections, restoring strength and sealing the opening. For more extensive damage or where the seal has failed, replacing the entire windshield may be necessary to ensure safety and prevent future leaks.
Are there preventive measures to avoid future windshield leaks?
Regularly inspect and maintain the sealant around your windshield. Clean the edges to remove debris that can weaken the adhesive. Avoid using harsh chemicals that may degrade the sealant, and schedule periodic professional inspections to catch issues early. Promptly address any minor cracks before they expand into leaks.
What should I avoid doing when trying to fix a windshield leak myself?
Avoid using household adhesives or sealants not designed for automotive use, as they may damage the windshield or reduce visibility. Do not attempt to seal large cracks with only temporary solutions; instead, seek professional repair. Lastly, do not delay addressing the leak, since water intrusion can lead to further vehicle damage and safety hazards.
Final Thoughts
To repair windshield leak, start by inspecting the seal around the edges for cracks or gaps. Clean the area thoroughly to ensure proper adhesion of the repair material. Apply a suitable sealant or adhesive, pressing firmly to seal any leaks.
Regularly check the repair to prevent further damage and ensure clear visibility. Remember, knowing how to repair windshield leak helps maintain your vehicle’s integrity and safety. Proper sealing keeps your windshield watertight, saving you money and hassle.


