To make your own car window paint, start by mixing a high-quality acrylic paint with a clear medium designed for glass surfaces, then apply it carefully with a fine brush or spray. For best results, prepare the window surface thoroughly and let the paint dry completely before using the window. With the right ingredients and technique, you can create durable, vibrant designs on your car windows that stand out.
Creating your own car window paint is a fun and cost-effective way to customize your vehicle. The key is choosing the right paint and medium to ensure longevity and clarity. First, select a high-quality acrylic paint and mix it with a transparent glass medium for smooth application. Clean your window thoroughly to remove dirt and grease, then apply your design using a fine brush or spray for even coverage. Allow the paint to dry completely before exposing it to weather or cleaning. Whether you’re adding a personal design or a functional tint, making car window paint yourself is straightforward and allows for endless creative possibilities.
How to Make Car Window Paint: A Step-by-Step Guide
Making your own car window paint can be a fun and cost-effective way to customize your vehicle. Whether you want to add personal touches, create temporary designs, or practice your artistic skills, understanding how to make car window paint is essential. This guide will walk you through the entire process, from selecting materials to applying your paint safely and effectively.
Understanding Car Window Paint: Types and Uses
Before you start making your own car window paint, it is crucial to know the different types available and their specific applications. There are mainly two kinds: permanent and temporary window paints.
Permanent Window Paints
Permanent paints are designed to last long and withstand weather conditions. They are often used for professional signage and detailed art. These paints usually contain durable solvents and resins that bond strongly with glass.
Temporary Window Paints
Temporary paints are easy to remove and ideal for seasonal decorations or temporary messages. They are water-based and less resistant to weather, making cleanup simple. They are perfect for beginners or anyone wanting non-permanent designs.
Ingredients Needed to Make Car Window Paint
Creating your own window paint requires a few basic ingredients. The quality and proportions of these ingredients will determine the durability and appearance of your paint.
- Water-based acrylic paint: The primary pigment for color and opacity.
- Glass etching or frosted spray: To add texture or special effects if desired.
- Glycerin or corn syrup: To improve adherence and flexibility of the paint.
- Dish soap: To help thicken the mixture and make application smoother.
- Vinegar (optional): To improve adhesion and preserve the paint.
- Water: To dilute the mixture to desired consistency.
Depending on your project, you may also add pigment powders or dyes to achieve specific colors.
Preparing Your Workspace and Materials
Setting up a clean, well-ventilated workspace is important for safety and quality. Cover nearby areas with newspaper or plastic to avoid accidental stains.
Required Tools
- Mixing bowls or containers: For blending your ingredients.
- Paintbrushes or sponges: For application and detailing.
- Spray bottles: To apply the paint evenly on the glass surface.
- Painter’s tape: To create clean edges or design outlines.
- Cleaning supplies: Rags, glass cleaner, and water for prep and cleanup.
Make sure all your tools are clean to prevent any impurities from affecting the quality of your paint.
Mixing Your Own Car Window Paint
Now that your workspace and tools are ready, you can start mixing your paint. Follow these steps carefully for the best results.
Step 1: Combine Acrylic Paint and Water
Start with a small batch in your mixing container. Mix equal parts water and acrylic paint to create a base. Stir thoroughly until smooth.
Step 2: Add Glycerin or Corn Syrup
Add a few drops of glycerin or corn syrup to the mixture. This helps the paint to stick and remain flexible on the glass surface.
Step 3: Incorporate Dish Soap and Vinegar
Add a teaspoon of dish soap to help thicken the mixture. For improved adhesion, add a splash of vinegar. Mix well to combine all ingredients thoroughly.
Step 4: Adjust Consistency
If the paint is too thick, add more water in small amounts. If too thin, add a bit more acrylic paint or dish soap. Your goal is a creamy, spreadable consistency that isn’t runny.
Testing and Fine-Tuning Your Car Window Paint
Before applying the paint on your vehicle, test it on a piece of glass or plastic. This step helps you check color opacity, adhesion, and drying time.
Perform a Small Test
Use a brush or spray bottle to apply a thin coat on the test surface. Let it dry to see how it behaves over time and weather exposure. Make adjustments as needed.
Evaluate Durability
Check if the paint adheres well and resists smudging or peeling. If it flakes easily, consider adding more glycerin or using a different type of acrylic base.
Applying Car Window Paint Properly
Proper application ensures your design looks professional and lasts longer. Follow these tips for the best results.
Preparing the Glass Surface
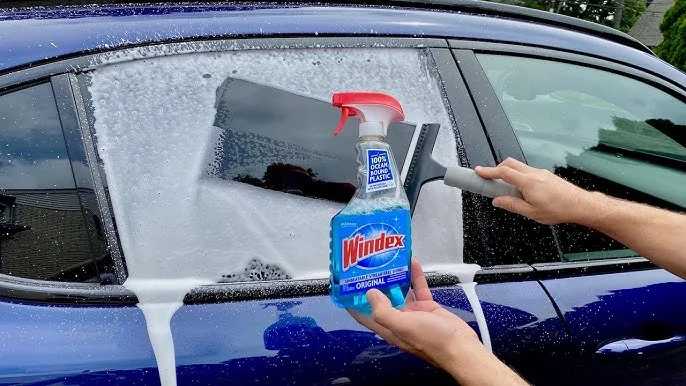
Clean your car window thoroughly with glass cleaner and a lint-free cloth. Remove all dirt, grease, and residues for optimal adhesion.
Designing and Masking
Use painter’s tape to create outlines or stop lines. Sketch your design lightly with a marker or stencil if needed. This helps keep your work neat.
Applying the Paint
Spray the mixture evenly across the glass or use a clean brush for detailed areas. Apply in thin layers to prevent drips and uneven coverage.
Drying and Curing
Allow each layer to dry completely—usually around 30 minutes—before adding another coat. Avoid touching the paint until fully dry to prevent smudging.
Tips for Long-Lasting and Safe Car Window Paint
To make your designs last longer and keep your vehicle safe, consider these tips.
Use a Clear Sealant
Once your design is dry, apply a clear acrylic sealant suitable for glass. This step helps protect your artwork from weather and washing.
Avoid Harsh Chemicals
Refrain from using abrasive cleaners or strong solvents on painted windows. Use mild soap and water instead.
Regular Maintenance
Clean your windows gently and avoid scrubbing the painted area too hard. Touch up any chipped paint promptly to maintain your design.
Related Topics: Additional Techniques and Creative Ideas
Looking to get more creative? Explore these options to enhance your car window paint projects.
Using Stencils for Precise Designs
Stencils help create intricate patterns or lettering. Secure them with painter’s tape and apply paint carefully for sharp edges.
Adding Embellishments
Consider adding glitter, metallic paints, or glow-in-the-dark pigments for unique effects. Always test new materials on a small area first.
Temporary vs. Permanent Designs
Choose the right type of paint for your needs. For temporary designs, water-based paints are best; for permanent artwork, opt for professional-grade acrylic or enamel paints.
Environmental Considerations
Always work in well-ventilated areas and dispose of leftover paint responsibly. Minimize environmental impact by using eco-friendly ingredients when possible.
FAQs about Making Car Window Paint
While this part isn’t included here, remember that understanding your materials and techniques is key to creating beautiful, durable designs. Practice, patience, and safety should always come first during your project.
Learn Tint in 60 seconds #windowtint #tint #tintingwindows #glass #cars #diy #diycrafts #walmart
Frequently Asked Questions
What ingredients are essential for creating a durable car window paint at home?
To create a long-lasting car window paint, you need a high-quality acrylic-based paint, a clear binder or medium to improve adhesion, and a solvent like alcohol or water to thin the mixture. Mixing in a small amount of a silicone-based additive can also enhance water resistance. Using pigments designed for glass ensures vibrant color and durability. Always choose weather-resistant components to withstand outdoor conditions.
How can I ensure the paint adheres properly to the glass surface?
Begin by thoroughly cleaning the glass with a glass cleaner and isopropyl alcohol to remove grease, dirt, and residues. Allow the surface to dry completely. Lightly sanding the glass with fine-grit sandpaper can improve paint adhesion. Apply a primer suitable for glass surfaces if available. Make sure to apply the paint in thin, even coats and allow sufficient drying time between layers to prevent peeling or cracking.
What techniques help achieve smooth and precise lines while painting on car windows?
Use painter’s tape or masking tape to outline your design before painting. Employ fine-tipped brushes or paint markers for detailed work. Work slowly and steady, applying multiple thin coats rather than a single thick layer. Keep the paint and tools at a consistent temperature to prevent uneven flow. Once finished, carefully remove the tape while the paint is still slightly tacky to avoid smudging and ensure sharp edges.
How do I prevent the paint from peeling or cracking over time?
Applying the paint in thin, even coats allows each layer to dry thoroughly, which reduces the risk of cracking. Use paints formulated for glass and outdoor use, which offer flexibility and weather resistance. After painting, seal the design with a clear waterproof coating or laminate designed for glass surfaces. Regularly clean the windows with gentle products and avoid abrasive scrubbing to preserve the paint job.
Final Thoughts
To make car window paint, gather the right materials such as glass paint, a clean cloth, and a stencil if desired. Clean the window thoroughly to ensure no dust or grease remains. Apply the paint carefully using brushes or spray for an even finish.
Finally, let the paint dry completely before rolling down the window. Knowing how to make car window paint can save money and allow for custom designs. With proper preparation and patience, you can create eye-catching window art that lasts.


