Diy Windshield Replacement Guide For Beginners: Step-By-Step Tips

If your windshield is cracked or shattered, fixing it yourself can save you time and money—if done correctly. The key to a successful DIY windshield replacement is careful preparation and patience. To replace your windshield yourself, gather the necessary tools, follow step-by-step instructions, and take your time to ensure a proper fit.
In short, replacing a windshield on your own involves removing the old glass, cleaning and prepping the frame, applying adhesive properly, and carefully setting the new windshield in place. While it may seem daunting at first, with the right guidance, you can handle this project confidently and safely.
Getting your hands dirty with a DIY windshield replacement might sound intimidating, but it’s entirely doable with the right guidance. Whether you’re looking to save a bit of cash or enjoy a rewarding challenge, this guide will walk you through each step, from preparing your workspace to final installation. It’s a practical skill that can come in handy during emergencies or simple repairs, and no prior experience is necessary—just patience and attention to detail.

DIY Windshield Replacement Guide for Beginners
Understanding the Basics of Windshield Replacement
Replacing a windshield might seem daunting, but with the right knowledge, it becomes manageable. First, it’s important to know why a replacement is necessary. Common reasons include large cracks, chips, or severe damage impacting visibility and safety.
Before starting, gather all the necessary tools and materials. Knowing the parts involved helps in understanding the replacement process better. The main components include the new windshield, adhesive (urethane), primer, and tools like a suction cup, razor blade, and retractable knife.
Tools and Materials You Need
To successfully replace your windshield, make sure you have the following:
- New windshield: Ensure it’s the correct make and model for your vehicle.
- Urethane adhesive: This bonds the windshield to the frame securely.
- Primer and cleaner: Used to prepare the surface for adhesion.
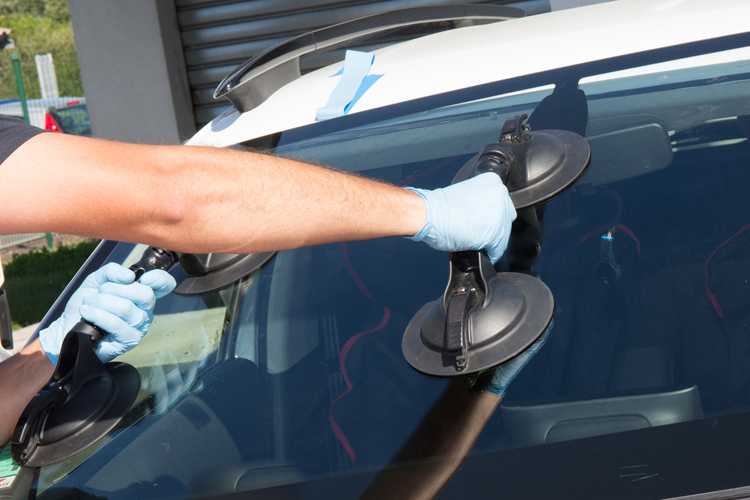
- Suction cups: Aid in handling and positioning the glass.
- Razor blades and utility knives: For removing old adhesive and cleaning surfaces.
- Gloves and safety goggles: To protect yourself during the process.
- Surface prep tools: Such as a plastic scraper or wire brush.
Preparing Your Vehicle for Windshield Replacement
Preparation is crucial for a successful replacement. Start by parking your car in a shaded area to prevent the adhesive from drying too quickly. Make sure the vehicle is turned off and the parking brake is engaged.
Next, carefully remove any dashboard or trim pieces that might obstruct access to the windshield. Cover nearby surfaces with painter’s tape to catch any drips or spills. Clean the entire windshield area thoroughly using a glass cleaner to remove dirt, grease, and debris.
Removing the Old Windshield
Removing the existing windshield requires patience and care. Use a utility knife to cut through the old urethane seal along the edges of the glass. Work slowly to avoid damaging the surrounding paint or the vehicle frame.
Once the sealant is cut, apply gentle pressure around the edges using a plastic pry tool to loosen the glass. Use suction cups to carefully lift the windshield out of its frame. Be cautious, as the glass can be heavy and fragile.
Cleaning and Preparing the Frame
After removing the old windshield, thoroughly clean the frame. Remove any remaining adhesive using a razor blade or wire brush. Ensure the surface is smooth, dry, and free from dirt or debris.
Apply a primer to the frame if recommended by the adhesive manufacturer. This improves bond strength and prevents future issues. Allow the primer to dry completely before proceeding.
Applying the New Windshield
Before installing, check the new windshield for cracks or defects. Apply a uniform bead of urethane adhesive around the entire perimeter of the frame. Use a caulking gun for a smooth, even application.
Carefully position the new windshield over the frame using your suction cups. Align it precisely to ensure proper fit and seal. Once in position, gently press it down to make contact with the adhesive.
Securing and Curing the New Windshield
Apply pressure around the edges to enhance adhesion. Use tape to hold the windshield in place if necessary. Allow the urethane to cure as per the manufacturer’s instructions, typically 24 hours.
Avoid driving the vehicle during this curing period. Keep the area free of dust or moisture to prevent bonding issues. Check periodically that the windshield remains properly aligned.
Final Touches and Inspection
Once the adhesive has cured, remove any masking tape or protective coverings. Inspect the seal around the windshield for gaps or leaks. Clean the glass thoroughly for optimal visibility.
Reinstall any removed interior trim pieces and ensure everything fits securely. Test your windshield wipers and defroster to confirm everything operates correctly.
Safety Tips for DIY Windshield Replacement
Always wear safety gear, including gloves and goggles, to prevent injuries. Work in a well-ventilated area for fumes from adhesives. Handle glass with care to avoid cuts or breakage.
Never rush the curing process; patience ensures a longer-lasting, better-sealed windshield. If at any point you feel unsure, consulting a professional is the safest choice.
Common Challenges and How to Overcome Them
Difficulty removing the old windshield can happen if the adhesive is stubborn. Use a specialized adhesive remover or heat gun cautiously to loosen it.
Aligning the new windshield precisely may take practice. Use masking tape for temporary positioning. Take your time to ensure proper fit before final bonding.
Tips for a Smooth Replacement Process
Plan your work ahead of time and gather all needed tools and materials. Read manufacturer instructions thoroughly for both the adhesive and the windshield.
Work slowly and methodically, focusing on each step. Keep a clean workspace to prevent dust from ruining the adhesive bond. Enlist a helper if possible to assist with handling and positioning the glass.

Similar Posts