How To Inspect Your New Windshield For Defects Effectively

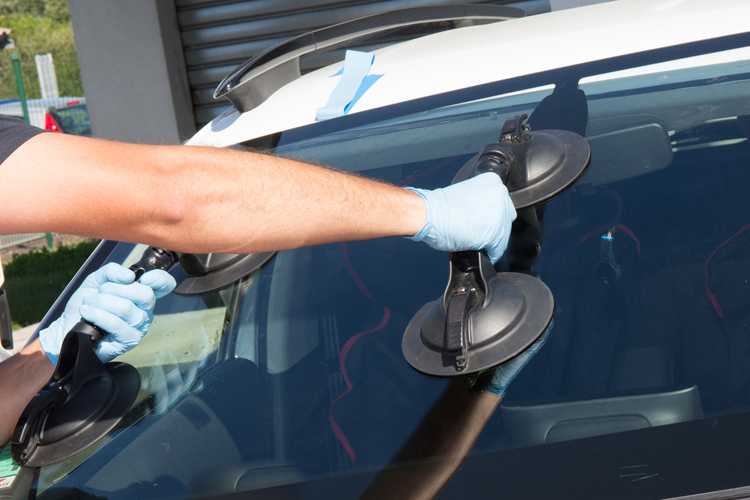
To quickly spot defects on your new windshield, start by inspecting it in good lighting, look closely for chips, cracks, or imperfections, and run your hand gently over the surface to feel for any irregularities. A thorough visual check and tactile inspection are key to ensuring your windshield is flawless.
In short, examine your new windshield under bright light for visible flaws and use your fingers to detect any irregularities on the surface. Take your time inspecting both the interior and exterior for any damage before driving off. Regular inspection helps catch potential issues early, ensuring your safety on the road.
When you get a new windshield installed, it’s tempting to think your job is done, but a careful inspection is essential. Defects like small chips, cracks, or imperfections can compromise your safety and the integrity of the glass. Proper inspection can help you spot these issues immediately, whether they came during installation or were missed initially. Starting with a well-lit environment, examine the entire surface for cracks or chips, paying close attention to edges and corners, which are more vulnerable. Run your fingers gently across the surface to feel for any rough spots or bubbles. Also, check for distortions or unusual reflections through the glass. This simple process ensures your new windshield is in perfect condition, giving you confidence on every drive.

How to inspect your new windshield for defects
Understanding the importance of a thorough inspection
Inspecting your new windshield is a vital step to ensure safety and avoid future problems. A defective windshield can impair your vision and compromise the structural integrity of your vehicle. Taking the time to carefully examine your windshield helps you catch issues early.
Preparing for the inspection
Before starting, find a well-lit, clean area with plenty of natural light. Use a flashlight if necessary to see cracks, chips, or other damages clearly. Make sure your eyes are clear and your hands are clean to avoid smudging the glass.
Visual examination of the windshield surface
Start by looking at the entire surface of your windshield from different angles. Check for any **visible cracks**, **chips**, or **scratches**. Small chips are common, but large cracks need quick attention.
Looking for cracks and chips
Cracks are lines that extend across or around the glass. Chips are small, usually caused by stones or debris hitting the glass. Look for **spiderweb cracks**, or cracks that run from the edge inward. Chips that are larger than a quarter should be checked by a professional.
Inspecting for manufacturing defects
Manufacturers sometimes produce windshields with defects. Look for **air bubbles**, **cloudiness**, or **waves** under the glass surface. These issues may not be obvious at first but can cause problems over time.
Checking for water and moisture damage
Run your finger along the edges of the windshield. Look for signs of **water leaks** or **moisture intrusion** like **fogging** or **water spots**. These could indicate poor sealing or installation issues.
Looking at the edges and sealant
Examine the perimeter of the windshield carefully. The sealant should be smooth, even, and intact. Any gaps, cracks, or peeling sealant can cause leaks and reduce the strength of the glass.
Assessing the installation quality
A well-installed windshield should sit flush against the frame. Check for uneven gaps or misalignment. Any **waviness** or **unevenness** might indicate improper installation, which can lead to future problems.
Checking for distortions and visual clarity
Look through the glass at objects both close and far away. Notice any **distortions**, **blurring**, or **color tints**. Clear, distortion-free glass is essential for safe driving.
Testing for glare and reflections
Sit in different lighting conditions, especially when the sun is bright. Notice if there are **excessive glare** or **unusual reflections** which could impair your vision. Properly installed and defect-free glass should minimize these issues.
Using tools for detailed inspection
A flashlight can help reveal tiny cracks or chips not visible in regular light. A magnifying glass is useful for closely examining small damages. These tools help you assess the severity of any issues.
Documenting and reporting issues
Take clear photos of any damage or irregularities you find. Record the location and size of cracks or chips. Sharing this information with your auto glass technician ensures accurate repairs.
What to do if you find defects
If you spot significant damage, contact a professional immediately. Avoid driving with large cracks or chips that could worsen quickly. Professional repair or replacement is often necessary for safety.
Maintaining your windshield after inspection
Keep your windshield clean and avoid sudden temperature changes. Regularly check for new damage and clean the surface with gentle, glass-safe products. Proper maintenance extends the life of your windshield.
Related topics to consider
- How to care for your vehicle’s windshield
- Signs your windshield needs replacement
- Differences between OEM and aftermarket windshields
Regular inspections for ongoing safety
Make inspecting your windshield part of your routine vehicle checks. Regularly scanning for new damage helps maintain safe driving conditions. Acting quickly on issues prevents costly repairs later.
Every step in inspecting your new windshield is important to ensure your safety and the longevity of your vehicle. Paying close attention to detail and understanding what to look for can save you money and prevent accidents. Always address any damages or irregularities immediately to enjoy clear and safe visibility on the road.
Do I need to recalibrate my windshield after replacing it…
Frequently Asked Questions
What specific areas should I focus on when examining my new windshield for damage?
Inspect the entire surface of your windshield thoroughly, paying close attention to the edges, corners, and the central viewing area. Look for any chips, cracks, or pitting that could compromise the integrity of the glass. Check for unusual distortions or blemishes that might interfere with visibility. Ensure that the windshield is free of any bubbles, scratches, or surface irregularities that could develop into larger problems over time.
How can I identify subtle imperfections that might not be immediately noticeable?
To detect minor flaws, use natural lighting and examine the windshield from different angles. Shine a flashlight along the surface to highlight any small cracks or chips. Observe the glass against a plain background, such as a white wall or open sky, to better see surface irregularities. Moving your head or changing your viewing position can reveal tiny imperfections that might be hidden at first glance.
What signs indicate that the windshield has been properly installed and sealed?
Check the edges of the windshield to ensure that the sealant is evenly applied without gaps, bubbles, or lifting edges. Press gently around the perimeter to see if the glass feels firmly attached without any movement. Also, inspect the surrounding frame for any signs of moisture or debris trapped between the glass and the frame, which could suggest improper sealing. These indicators confirm that the windshield is correctly installed and sealed for durability and safety.
Final Thoughts
To inspect your new windshield for defects, start by examining it in good lighting. Look closely for any cracks, chips, or scratches. Check the edges and corners, where issues are common. Make sure the glass is clear and free of blemishes. Being thorough ensures your safety and helps prevent future problems.

Similar Posts