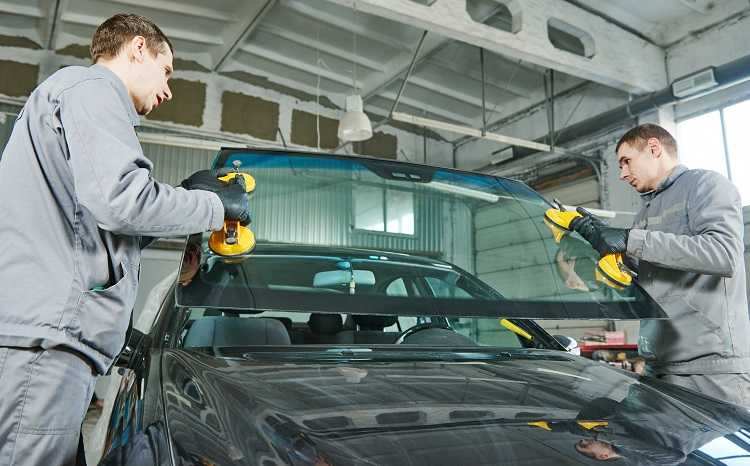
To install a laminated windshield, start by carefully removing the old glass, cleaning the frame thoroughly, and applying primer before placing the new windshield with precision. Secure it with appropriate sealants and ensure proper curing to prevent leaks. This process requires patience and attention to detail, but with the right tools and steps, you can achieve a professional finish.
Installing a laminated windshield might seem daunting, but with the right guidance, it becomes a manageable task. The key is to handle the glass carefully, ensure the frame is spotless, and use quality sealants for a perfect fit. Knowing the proper steps helps ensure your new windshield will be secure and functional, providing safety and clarity on the road. Whether you’re replacing a cracked glass or upgrading for better safety features, understanding the process can save you time and money while giving your vehicle a fresh, polished look.

How to Install Laminated Windshield
Installing a laminated windshield might seem complicated, but with the right tools and steps, it becomes a manageable task. This guide will walk you through the process, ensuring your installation is safe and effective. Proper installation not only guarantees clear visibility but also enhances your vehicle’s safety features. Now, let’s explore the detailed stages involved in installing a laminated windshield.
Understanding Laminated Windshields
Before starting the installation, it is important to grasp what makes laminated windshields special. Laminated windshields consist of two glass layers bonded with a layer of polyvinyl butyral (PVB). This construction provides better safety and prevents dangerous shards from flying in case of breakage.
Benefits of Laminated Windshields
- Enhanced safety during accidents
- Protection from UV rays
- Reduced noise from outside
- Better durability and resistance to impact
Types of Laminated Windshields
- Standard laminated windshields for regular vehicles
- UV protected windshields with special coatings
- Sound-insulating windshields to reduce road noise
Tools and Materials Needed
Preparing the right tools ensures a smooth installation process. The key tools include:
- Windshield adhesive or urethane sealant
- Glass removal tools
- Rubber mallet
- Suction cups for handling glass
- Trim removal tools
- Clean rags and rubbing alcohol
- Protective gloves and safety glasses
- Measuring tape and masking tape
Ensuring all materials are of quality guarantees a strong and lasting bond. High-quality urethane sealant specifically designed for automotive glass is essential.
Preparation Steps Before Installation
Proper preparation is critical to a successful windshield installation. Follow these important steps:
Clean the Vehicle and Workspace
Make sure the vehicle is parked on a flat surface and the workspace is free of dust and debris. Clean the area around the windshield frame thoroughly using rubbing alcohol to remove grease, dirt, and old adhesive residues.
Remove the Old Windshield Carefully
Using glass removal tools, gently cut through the existing adhesive around the windshield edges. Support the glass with suction cups to prevent it from falling prematurely. Carefully lift the old windshield out of the frame without damaging the paint or surrounding trim.
Inspect the Frame
Check the windshield frame for rust, damage, or debris. Clean out any remnants of old adhesive and repair minor damages if necessary. A clean and smooth surface is crucial for proper adherence.
Applying the Urethane Adhesive
The adhesive forms the bond that holds the new windshield in place. Proper application is vital for safety and durability.
Loading the Adhesive
Use a caulking gun fitted with a urethane sealant cartridge. Load the adhesive into the gun according to the manufacturer’s instructions.
Applying the Sealant
Begin at the corners, applying a continuous bead of urethane around the entire perimeter of the frame. Maintain a steady hand for an even and consistent line. Be sure to fill any gaps or dents in the frame for a secure fit.
Creating a Bead Pattern
It’s advisable to create a zigzag or circular pattern of adhesive for better coverage. This ensures a tight seal and reduces the risk of leaks or wind noise.
Installing the Laminated Windshield
Now, it’s time to place the new laminated windshield into the frame.
Handling the Glass
Use suction cups to carefully lift the new windshield. Always handle the glass by the edges to avoid fingerprints and smudges on the surface.
Positioning the Windshield
Align the windshield with the frame carefully. Make sure the trim tabs, if any, are correctly positioned. The glass should sit flush against the adhesive bead.
Securing the Windshield
Gently press the windshield into place, ensuring full contact with the urethane bead. Use slight pressure to help the adhesive spread evenly across the edges.
Applying Masking Tape
Place masking tape around the edges to hold the glass in position while the adhesive cures. This prevents shifting and ensures a snug fit.
Curing the Adhesive and Final Checks
Allow the urethane to cure fully before driving the vehicle. Curing times may vary from a few hours up to 24 hours depending on the product used.
Waiting Period
Avoid applying stress to the windshield during this time. Keep the vehicle indoors or in a shaded area to prevent temperature fluctuations that could affect the curing process.
Final Inspection
Once cured, remove the masking tape and inspect the seal. Look for gaps, bubbles, or uneven areas. Make any necessary adjustments immediately.
Cleaning the Surface
Use a clean cloth and rubbing alcohol to clean the glass surface, removing any adhesive residues and fingerprints. Ensure visibility is crystal clear before driving.
Additional Tips for a Successful Installation
- Work in a dry, temperature-controlled environment to optimize adhesive curing
- Always wear safety gear to protect against glass shards and chemical exposure
- Follow the adhesive manufacturer’s instructions meticulously for best results
- Seek professional help if you are unsure about handling glass or adhesives
Related Topics to Consider
How to Choose the Right Laminated Windshield
Select a windshield that matches your vehicle’s specifications, including size, tint, and additional features like UV protection.
Maintenance Tips for Laminated Windshields
Regular cleaning with non-abrasive products, avoiding impact from road debris, and inspecting for cracks will prolong the lifespan of your windshield.
Cost Factors and Replacement Tips
Understanding the costs involved and choosing reliable suppliers can save money and ensure quality installation.
Following these detailed steps and tips guarantees a secure, durable, and safe laminated windshield installation. Remember, patience and proper technique are key to achieving the best results for your vehicle’s safety.
How to use Permatex Windshield Repair Kit #howto #permatex #mechanic #diy #car #glass #fypシ
Frequently Asked Questions
What are the key tools needed to install a laminated windshield?
To install a laminated windshield effectively, gather essential tools such as a windshield removal tool or blade, suction cups for handling the glass, a window cleaning solution, primer or adhesive, and a rubber mallet. Having these tools ready ensures the installation process proceeds smoothly and safely.
How do you prepare the vehicle and windshield surface before installation?
Start by thoroughly cleaning the area around the windshield frame with a glass cleaner to remove dirt and debris. Scrape off any old adhesive or sealant using a plastic scraper. Make sure the surface is dry and free of grease. Proper preparation creates a strong bond and reduces the risk of leaks or wind noise later.
What steps should I follow to properly fit and secure the laminated windshield?
Position the laminated windshield carefully into the frame, using suction cups to handle it safely. Apply primer or adhesive uniformly along the edges, then press the windshield into place. Use a rubber mallet gently if needed to ensure a snug fit. Finally, allow the adhesive to cure as per the manufacturer’s instructions before driving the vehicle.
Final Thoughts
To install a laminated windshield, start by carefully removing the old glass and cleaning the mounting area. Ensure the new windshield fits properly before applying any adhesive. Use a specialized adhesive and follow the manufacturer’s instructions for the best results.
Once the adhesive is set, press the laminated windshield firmly into place and secure it with clips if necessary. Allow sufficient drying time before driving to ensure a secure fit.
In conclusion, to install laminated windshield, carefully prepare the surface, apply the adhesive correctly, and position the glass precisely. This ensures a safe, long-lasting installation and reliable visibility.

- What Size Windshield Crack Can Be Repaired? - August 4, 2026
- How Long Glass Coatings Last, and Why Yours Stopped - August 4, 2026
- Windshield Repair vs. Replacement: When You Can Fix It and When You Can’t - July 12, 2026