How To Ensure Proper Seal During Windshield Replacement For Safety
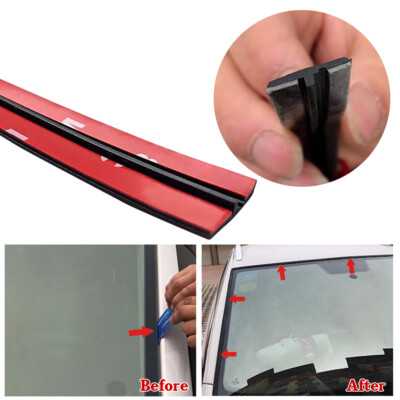
To ensure a proper seal during windshield replacement, it’s essential to use the right adhesive, clean all surfaces thoroughly, and apply even pressure during installation. This guarantees a tight fit that prevents leaks, wind noise, and structural issues. Proper sealing not only extends the lifespan of your windshield but also keeps you safe on the road.
A secure seal during windshield replacement is crucial for safety, comfort, and the vehicle’s integrity. To achieve it, professionals recommend using high-quality adhesives, properly preparing the surface before installation, and ensuring the windshield is pressed evenly into place. Paying attention to these details can make a significant difference in preventing leaks and ensuring your windshield stays intact over time.
Replacing a windshield might seem straightforward, but ensuring a proper seal can be tricky if you’re not familiar with the process. When replacing your windshield, the goal is to achieve a watertight, airtight fit that withstands the stresses of driving. This involves more than just placing the glass; it requires careful preparation, the right materials, and precise application techniques. If done correctly, a proper seal keeps your car watertight, reduces wind noise, and maintains the structural integrity of your vehicle, providing peace of mind every time you hit the road.

How to Ensure Proper Seal During Windshield Replacement
Understanding the Importance of a Proper Seal
A good seal during windshield replacement is essential for vehicle safety and comfort. It keeps water, dirt, and air from entering your car’s interior. A properly sealed windshield also helps maintain the structural integrity of your vehicle during accidents.
Preparing Your Vehicle for Replacement
Before replacing the windshield, clear the area around the glass. Remove any items near the windshield interior to prevent debris from contaminating the seal. Ensure the vehicle’s surface is clean and dry for optimal adhesion.
Cleaning the Adhesion Surface
Use a glass cleaner and a lint-free cloth to thoroughly clean the bonding area. Remove any old adhesive, dirt, or grease that could weaken the new seal. A spotless surface is crucial for a secure and long-lasting fit.
Inspecting the New Windshield
Check the new windshield for any damage or defects before installation. Confirm that it matches your vehicle’s specifications. An incompatible or damaged glass can compromise the seal quality.
Choosing the Right Sealant
Selecting the appropriate adhesive or sealant is vital for ensuring a proper seal. Use products recommended by the vehicle manufacturer for compatibility and durability.
Types of Sealants Used in Windshield Replacement
- Polyurethane Sealant: Offers excellent bonding strength and flexibility.
- Butyl Tape: Provides easy application and waterproof sealing.
Always verify that the sealant is compatible with your vehicle’s make and model.
Applying the Sealant Correctly
Proper application of sealant is key to achieving a secure seal. Follow these steps carefully to avoid gaps or air leaks.
Applying a Continuous Bead
Use a caulking gun to apply the sealant in a continuous, even bead around the windshield frame. Avoid gaps or lumps that could cause leaks.
Maintaining Proper Thickness
Ensure the sealant bead is neither too thick nor too thin. A consistent layer provides the best adhesion and flexibility.
Installing the Windshield Properly
During installation, the process must be precise to prevent structural weaknesses.
Aligning the Windshield Correctly
Carefully position the windshield onto the sealant bead, ensuring it is centered and aligned with the vehicle frame. Proper alignment avoids stress points and improves seal integrity.
Applying Pressure During Installation
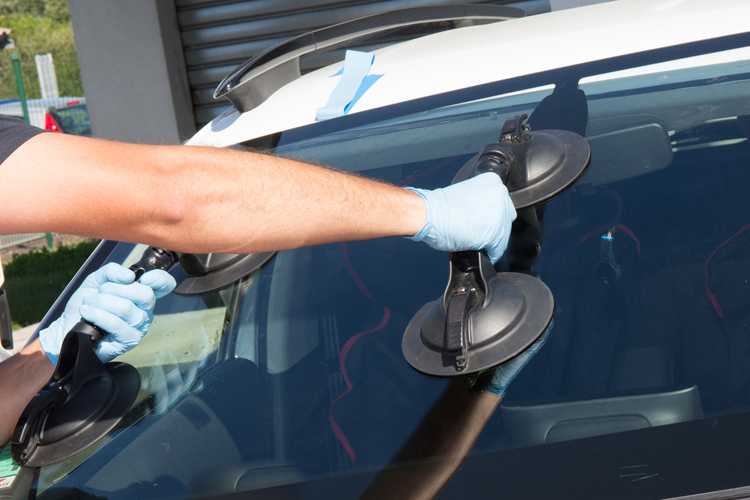
Press the windshield firmly into place, using the recommended tools or supports. Maintain uniform pressure to make sure the sealant cures evenly and bonds well.
Allowing Adequate Curing Time
Patience during the curing process is essential. Follow the sealant manufacturer’s instructions for curing time before driving your vehicle.
Factors that Affect Curing Time
Temperature, humidity, and thickness of the sealant can impact curing times. Cooler or humid conditions may extend the process.
Ensuring a Complete Cure
Avoid washing the vehicle or exposing it to rain until the sealant has fully cured. This guarantees the seal’s strength and prevents leaks.
Post-Installation Inspection and Testing
Once the sealant is cured, check for possible issues.
Visual Inspection
Look for gaps, bubbles, or uneven areas around the windshield edge. These can indicate poor sealing.
Leak Testing
Spray water over the windshield and observe inside for any leaks. A proper seal prevents water from entering during rain or car washes.
Additional Tips for Ensuring a Reliable Seal
Employing extra techniques can improve the longevity of the seal.
- Use Masking Tape: Apply tape to protect adjacent areas during sealant application and removal.
- Work in Optimal Conditions: Install the windshield in a clean, dust-free environment with stable temperature and humidity.
- Follow Manufacturer Guidelines: Always adhere to the specific instructions for your vehicle and sealant products.
Common Mistakes to Avoid During Windshield Replacement
Being aware of mistakes can help prevent future problems.
- Applying sealant in cold or humid conditions
- Not cleaning the surface thoroughly before application
- Rushing the installation process
- Skipping the curing time before driving
- Using improper or incompatible sealants
Signs of a Bad Seal and When to Seek Professional Help
Knowing the warning signs can save you from costly repairs later.

Similar Posts