How To Remove Car Window Tint Effectively And Safely
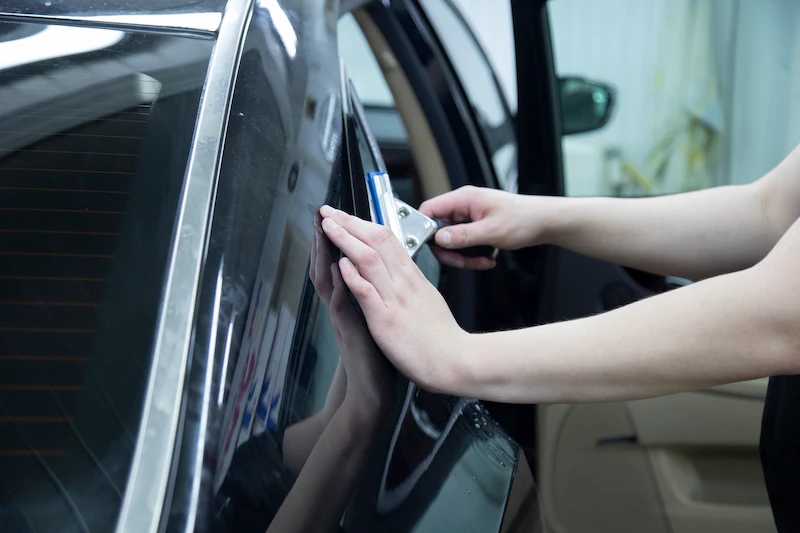
To effectively remove car window tint, start by carefully peeling off the film, then use a commercial tint removal solvent or a mixture of soapy water and a razor blade to gently scrape away any remaining adhesive. Applying heat with a hairdryer or heat gun helps loosen the adhesive, making removal easier and avoiding scratches. Always be patient and work slowly to prevent damaging your windows.
Removing car window tint can seem daunting, but with the right approach, it’s straightforward. First, peel off as much of the tint as possible with your hands or a plastic scraper. Next, apply heat to soften the adhesive and use a solvent or soapy water to help loosen stubborn residues. Finish by gently scraping off leftover glue and cleaning the glass thoroughly. This method ensures a smooth, clear window without costly professional help. Whether you’re upgrading your tint or going back to clear glass, this step-by-step guide will make the process simple and effective.

How to Remove Car Window Tint
Removing car window tint can seem tricky, but with the right tools and steps, you can do it successfully. Whether the tint is old, damaged, or you’re changing the style, knowing how to do it properly saves time and money. This guide will walk you through each step to make the process easier and safer.
Understanding the Types of Car Window Tint
Before starting, it’s helpful to know what kind of tint you have. The most common types include dyed, metallic, and ceramic tints. Each type reacts differently to removal methods, so identifying your tint type can influence the process.
Dyed Window Tint
This is the most affordable and common type. It consists of a dye between the adhesive and the film. Dye tint is easier to remove but may leave some residue behind.
Metallic Window Tint
This type contains tiny metallic particles. It tends to be more durable and can interfere with electronic signals. Removing metallic tint requires more care to avoid scratching glass or damaging electronics.
Ceramic Window Tint
High-end and more durable, ceramic tint is made from non-conductive ceramic particles. It is the hardest to remove due to its strong adhesive qualities. Special tools may be necessary for this type.
Gathering the Necessary Tools and Supplies
Proper tools make the tint removal process faster and safer. Here is a list of items you’ll need:
- Spray bottle filled with water mixed with a few drops of dish soap or vinegar
- Plastic razor blade or scraper
- Glass cleaner or rubbing alcohol
- Microfiber cloths or soft rags
- Heat gun or hairdryer
- Gloves (optional but recommended for safety)
- Painter’s tape (optional, for protecting edges)
- Adhesive remover (if needed for residue)
Preparing Your Work Area
Choose a shaded, well-ventilated space to work. Sunlight can make the adhesive harder to remove. Make sure your car is parked on a flat surface and roll down windows slightly for easier access.
Heating the Window to Loosen the Adhesive
Start by warming the tint with a heat gun or hairdryer. Hold the heat source about 6 inches away from the glass surface. Move it evenly across the tint to soften the adhesive without overheating the glass.
Warming the film helps loosen the glue, making it easier to peel off. Be sure to keep moving the heat source to prevent cracking or damaging the glass.
Peeling Off the Tint
Once heated, use your fingers or a plastic razor to gently lift a corner of the tint from the glass. Slowly peel it back, applying even pressure. Be patient to avoid tearing the film or leaving pieces behind.
Work gradually, pulling at a 45-degree angle. If you encounter resistance, apply more heat to loosen the adhesive further.
Removing Residue and Sticky Adhesive
Using a Solvent or Adhesive Remover
If adhesive remains after peeling, apply a commercial adhesive remover or a mixture of rubbing alcohol and water. Spray it generously over the sticky areas.
Let the solvent sit for a few minutes to soften the glue, then use a microfiber cloth or scraper to wipe it away. Repeat as necessary until all residue is gone.
Dealing with Tough Residue
For stubborn spots, apply more adhesive remover and let it sit longer. Use a plastic scraper to gently lift the hardened glue. Avoid metal tools that can scratch the glass surface.
Cleaning the Window After Tint Removal
Once all tint and residue are gone, clean the entire window with glass cleaner or rubbing alcohol. This step ensures a clear, streak-free surface.
Use a clean microfiber cloth to wipe down and dry the glass thoroughly. Inspect the window for any remaining adhesive or film pieces before finishing.
Tips for a Safe and Effective Tint Removal
- Always work in a shaded area to prevent the heat from escaping quickly.
- Be patient during the peeling process to avoid damaging the glass or scratching it.
- Use plastic tools to prevent scratches on the glass surface.
- Test adhesive removers on a small, inconspicuous area first.
- Wear gloves if you have sensitive skin or are using chemicals.
- If the tint is stubborn and doesn’t peel easily, consider seeking help from a professional.
Additional Methods for Removing Car Window Tint
Hot Water and Detergent Method
This method involves soaking the window with hot water mixed with dish soap. Let it sit for several minutes to loosen the glue. Then, peel and scrape off the tint as described above.
Steam Method
Using steam from a steamer or boiling water can soften the adhesive further. Be careful to prevent water from dripping into the car interior. Use a scraper after steaming to lift the tint.
Using a Commercial Tint Removal Solution
Specialized products are available that make removing tint easier. Follow manufacturer instructions for application and removal.
Precautions and Safety Guidelines
Always wear gloves and work in a ventilated space when handling chemicals. Avoid inhaling fumes by working outdoors or in a well-ventilated garage. Be cautious when using heat to prevent burns or damage.
If at any point you feel unsure or encounter difficulties, consulting a professional tint removal service is a safe option. They have specialized tools and experience to complete the job cleanly and efficiently.
Removing car window tint takes patience and care, but following these steps ensures a clear window ready for a new tint or a clean look. Proper preparation and gentle techniques will protect your glass and save you money in the long run.

Similar Posts