How To Remove Air Bubbles From Windshield Tint Effectively

To eliminate air bubbles from your windshield tint quickly, start by gently lifting the edge of the film near the bubble, then smooth it out with a squeegee or cloth, pushing the air towards the edge. Using a pin, prick the bubble to release the trapped air, and then press out any remaining air with consistent, firm strokes. Applying a little heat with a hairdryer can also help to loosen the adhesive for easier smoothing.
Getting rid of air bubbles in your windshield tint might seem tricky, but with patience and the right technique, you can achieve a smooth, bubble-free finish. In essence, the key steps involve carefully prying up the film, pushing the air out from underneath using a squeegee or cloth, and utilizing heat to make the adhesive more pliable. Regularly working from the center of the bubble outward helps ensure a flawless look without damaging the tint. Whether you’re fixing minor imperfections or installing new tint, knowing how to handle air bubbles keeps your windows looking sleek and professional.

How to Remove Air Bubbles from Windshield Tint
Understanding Why Air Bubbles Form in Windshield Tint
Air bubbles in windshield tint are common, especially during the application process. They usually happen when the film is not applied smoothly or trapped air gets underneath. Knowing why these bubbles appear can help you take steps to prevent and fix them effectively.
Preparing Your Vehicle Before Tint Application
Proper preparation is key to avoiding air bubbles. Clean the windshield thoroughly using isopropyl alcohol and a microfiber cloth. Remove all dirt, dust, and grease, as these can cause the film to lift and trap air.
Tools Needed for a Smooth Application
Before starting, gather essential tools such as:
- Spray bottle with soapy water (mild soap and water mixture)
- Pin or needle (for popping bubbles)
- Plastic squeegee or credit card wrapped in a soft cloth
- Microfiber cloth for cleaning and wiping
Having these tools ready ensures a smoother process and better results.
Step-by-Step Guide to Remove Existing Air Bubbles
Removing air bubbles can be done carefully with patience and the right technique. Follow these steps for best results:
Step 1: Gently Lift the Edges of the Film
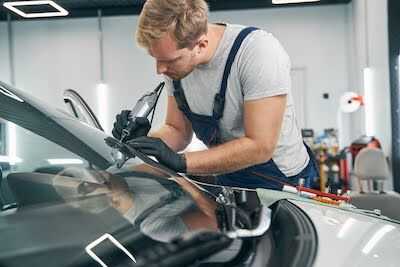
If bubbles are localized, carefully lift the edge of the tint using a plastic scraper or your fingernails. Be gentle to avoid tearing the film.
Step 2: Apply Soapy Water Solution
Spray the area with the soapy water mixture. This helps loosen trapped air and allows you to reposition the film easily.
Step 3: Use a Squeegee to Evenly Press Out Bubbles
Starting from the center, push the air bubbles towards the edges with a squeegee. Keep the pressure light but firm to prevent tearing or scratching the film.
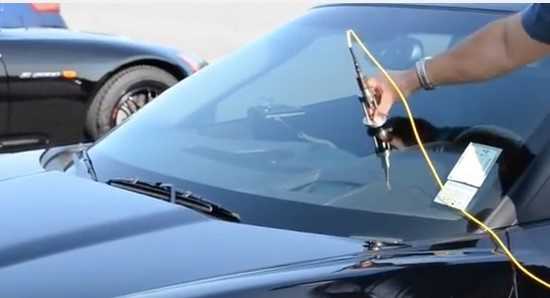
Step 4: Pop Large Bubbles with a Needle
For stubborn bubbles, gently pierce the center with a fine needle, then press out the air with a squeegee. Be cautious to avoid damaging the tint.
Step 5: Wipe the Area
Use a microfiber cloth to clean excess water and check if bubbles have disappeared. Repeat the process if necessary.
Using Heat to Remove or Prevent Air Bubbles
Heat can help smooth out the tint and prevent bubbles from forming during or after application.
How to Properly Use a Heat Gun or Hairdryer
Set your heat source to a low temperature. Gently warm the film while pressing out bubbles with a squeegee. Keep the heat moving to avoid overheating and damaging the tint.
Safety Tips for Heating
Always hold the heat source at a safe distance. Avoid prolonged exposure to prevent warping or discoloration of the film.
Best Techniques for Applying Windshield Tint Without Bubbles
Prevention is better than cure. Use these techniques for a bubble-free application:
Work in a Dust-Free Environment
Choose a clean, dust-free area to carry out the tinting process. Dust particles are a common cause of air bubbles.
Apply the Film Gradually
Peel back small sections of the backing paper as you stick the film. This reduces chances of trapping air.
Use the Right Amount of Soapy Water
Too much solution can make the film slippery, making it harder to position. Too little can cause air pockets. Aim for a light, even spray.
Start from the Center and Work Outward
Push air and water towards the edges using a squeegee. This directs bubbles away from the center where they are most noticeable.
Post-Application Tips for Keeping Tint Bubble-Free
After installing the tint, follow these tips to ensure a smooth, bubble-free appearance over time:
Allow the Windex or Cleaning Solution to Set
Let the film cure for at least 24 hours without washing or rolling down windows.
Avoid Excessive Touching
Touching the film can disrupt the adhesion and create new bubbles or wrinkles.
Regular Maintenance
Use a soft microfiber cloth with mild soap solution to clean the tint. Avoid abrasive cleaners or brushes that can lift the edges.

Similar Posts