How To Replace Rear Windshield Glass For Easy Car Repair

To replace a rear windshield glass quickly and effectively, start by carefully removing the broken glass, clean the frame thoroughly, and then apply new adhesive before setting the new glass in place. It’s important to handle the glass carefully and ensure the adhesive cures properly for a secure fit.
If your rear windshield is shattered or cracked, replacing it might seem daunting, but with the right tools and step-by-step guidance, you can do it yourself. First, remove all broken glass and clean the surrounding frame. Next, apply a high-quality adhesive or sealant along the edges of the new windshield. Carefully position the new glass onto the frame, pressing it firmly in place. Allow the adhesive to cure as per the manufacturer’s instructions before driving. With patience and attention to detail, replacing your rear windshield can be a manageable DIY project that saves you money and gets you back on the road quickly.

How to replace rear windshield glass
Replacing the rear windshield glass is a task that requires patience and attention to detail. It involves carefully removing the damaged glass and installing a new one without damaging the vehicle. Knowing the right steps can help you do it safely and effectively.
Tools and Materials You Need
Before starting, gather all necessary tools and materials. Having everything ready makes the process smoother and quicker.
- Replacement rear windshield glass (make sure it fits your car model)
- Glass removal tool or heated glass removal kit
- Rubber gloves
- Safety goggles
- Adhesive remover or glass cleaner
- UV adhesive or automotive-grade glue
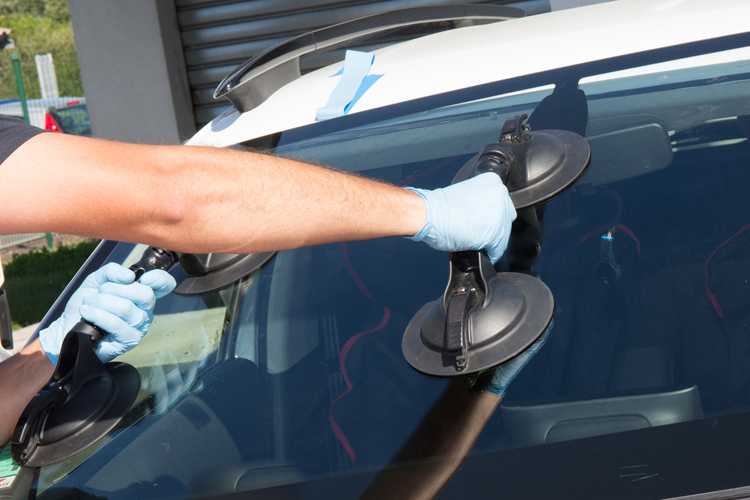
- Suction cups for handling glass
- Plastic pry tools
- Masking tape
- Cleaning cloths or paper towels
- Trim removal tools (if needed)
Preparing Your Work Area
Choose a clean, flat space with good lighting. Cover nearby surfaces to protect from glass shards and spills. Wear safety gear to avoid injuries caused by broken glass or sharp tools.
Safety Precautions
Working with glass can be dangerous. Always wear gloves and goggles to stay safe. Ensure your car’s engine is off and the parking brake is engaged. Be cautious when handling sharp glass edges.
Removing the Damaged Rear Windshield
Step 1: Access the Back of the Car
Open the trunk or hatch to access the interior of the rear windshield. Remove any interior panels or trim if necessary, using trim removal tools.
Step 2: Detach the Interior Molding and Trim
Use plastic pry tools to gently remove any molding, trim, or weather stripping around the glass. Keep these parts safe for reinstallation.
Step 3: Loosen the Old Adhesive
Apply an adhesive remover along the edges of the glass. Use a scraper or plastic pry tool to gently loosen the glass from the frame. Be careful not to crack the glass further or damage the vehicle.
Step 4: Remove the Broken Glass
Wear gloves and safety goggles. Use suction cups to grip the glass firmly. Carefully lift the damaged windshield away from the vehicle, supporting it as it comes free.
Preparing the Vehicle for the New Glass
Step 1: Clean the Frame
Thoroughly clean the surface where the new glass will sit. Remove old adhesive, dirt, and debris using a recommended adhesive remover and a clean cloth.
Step 2: Inspect the Seal Area
Check for damage or rust on the frame. Repair any issues before proceeding. A clean, smooth surface ensures a good seal for the new windshield.
Installing the New Rear Windshield Glass
Step 1: Apply Adhesive
Use a UV-curing adhesive or automotive-grade glue recommended by the manufacturer. Apply a continuous bead around the perimeter of the frame. Follow product instructions closely.
Step 2: Position the New Glass
With help, lift the new windshield glass. Using suction cups, carefully align it with the frame. Place the glass onto the adhesive, pressing gently to ensure a snug fit.
Step 3: Secure the Glass in Place
Hold the glass firmly or use masking tape to hold it in position while the adhesive sets. Keep the vehicle steady and avoid touching or applying pressure on the glass during curing.
Final Steps and Curing
Step 1: Allow the Adhesive to Cure
Follow the manufacturer’s curing time, usually several hours or as specified. Keep the area free of dust and vibrations during this period.
Step 2: Reinstall Interior Trim and Molding
Once the adhesive has fully cured, replace all removed trim and molding. Ensure everything snaps securely into place.
Step 3: Clean the Glass
Wipe the new windshield with a glass cleaner to remove fingerprints and smudges. Avoid using harsh chemicals that could affect the adhesive bond.
Additional Tips for a Successful Replacement
- Work in optimal weather conditions: Avoid replacing glass in extreme cold or heat, as adhesives may not cure properly.
- Use quality materials: Investing in high-quality adhesive and glass ensures safety and durability.
- Seek professional help if needed: If you feel unsure, hiring a professional ensures proper installation and safety compliance.
Related Topics
How to Replace a Car Window
Replacing side windows follows similar principles but involves different tools and techniques, especially concerning sealing and trim removal.
Repairing Small Cracks or Chips
Small cracks in the windshield can sometimes be repaired with professional resin injection, saving the cost of full replacement.
Maintaining Your Windshield
Regular cleaning and avoiding rough handling can extend the life of your windshield and prevent costly repairs.
Replacing the rear windshield glass is achievable with proper preparation and care. Take your time, follow safety guidelines, and use the right tools for a smooth, successful swap.
How to PROPERLY Replace a Rear Windshield (No Special Tools DIY)
Frequently Asked Questions
What tools do I need to replace the rear windshield glass?
To replace the rear windshield glass, gather essential tools such as a glass removal tool or a utility knife, a suction cup windshield removal tool, a rubber mallet, a heat gun or hairdryer, adhesive remover, automotive glass adhesive, masking tape, gloves, and safety goggles. Having these tools ready ensures a safer and more efficient replacement process.

Similar Posts