Concave Mirror Calculator: Find Focal Length Fast
You've got a concave mirror calculator open. You type in the numbers. The result looks wrong.
You stare at the screen wondering if you flipped a sign somewhere.
A concave mirror calculator is a tool that solves the mirror equation 1/f = 1/do + 1/di for you. It takes the guesswork out of manual algebra. But it only works if you feed it the right values with the correct sign convention.
Getting the sign of the image distance wrong is the most common mistake we see in physics labs. That's not a calculator problem. It's a setup problem.
Let's fix that.
Quick Answer
A concave mirror calculator uses the mirror equation 1/f = 1/do + 1/di. You input two known values. It solves for the third.
You also get magnification and image type. It saves time and prevents algebra errors. Enter focal length and object distance.
Get image distance and magnification instantly.
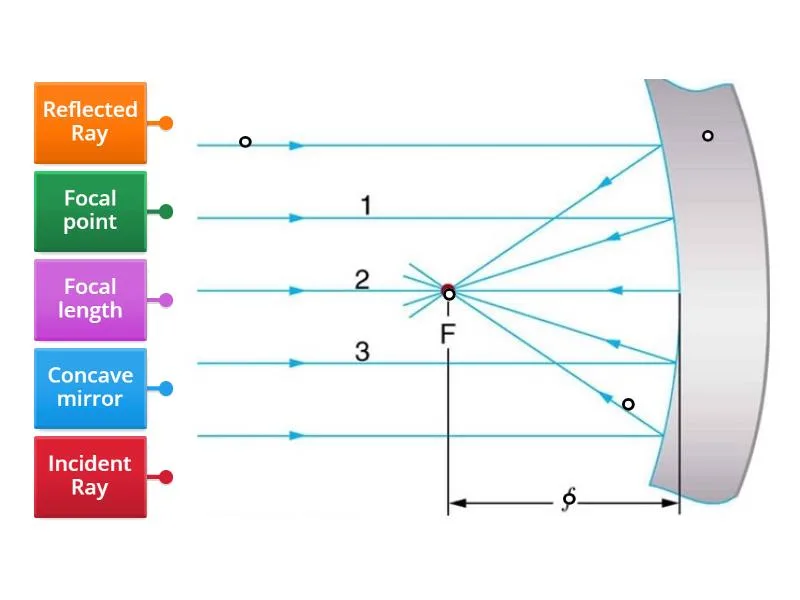
The Problem: Why Mirror Calculators Confuse People
Most people think a calculator is bulletproof. You type numbers, you get the right answer. With concave mirrors, that's not how it works.
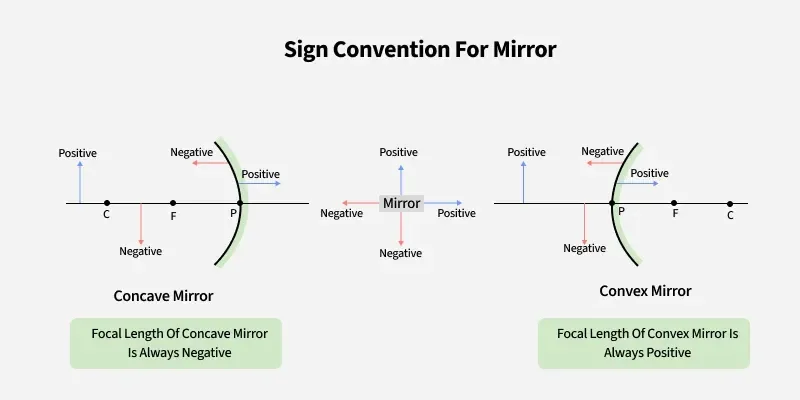
The confusion starts with sign conventions. In physics, concave mirrors have a positive focal length. That's the standard Cartesian convention.
Many students mix this up with convex mirrors, where focal length is negative. A calculator does not know which type of mirror you are using. It just does the math you give it.
Another issue is the object distance. For a real object in front of the mirror, do is always positive. If someone enters a negative value by accident, the calculator still runs.
It gives you a number. That number is wrong.
The real problem is that a calculator hides the logic. When you do algebra by hand, you see every step. You catch sign errors.
With a calculator, you just see the final output. If it is wrong, you have no idea why.
The most common source of error is entering the radius of curvature instead of the focal length. Focal length is half the radius. For a mirror with a radius of 40 cm, the focal length is 20 cm.
Enter 40 cm and the calculator gives you a different image distance entirely.
How a Concave Mirror Calculator Actually Works
A concave mirror calculator runs on two equations. The mirror equation and the magnification equation.
The mirror equation is:
1/f = 1/do + 1/di
Where:
fis focal length (positive for concave)dois object distance (positive for real objects)diis image distance (positive for real images, negative for virtual)
The magnification equation:
m = -di/do
Or alternatively:
m = hi/ho
Where:
hiis image heighthois object height
A negative magnification means the image is inverted. A positive magnification means upright.
The calculator takes your two known values. It rearranges the equation to solve for the unknown. Then it plugs the result into the magnification formula.
Here is a quick reference table:
| Known Values | Calculator Solves For | Output You Get |
|---|---|---|
| f and do | di | Image distance (real if positive) |
| f and di | do | Object distance (always positive for real objects) |
| do and di | f | Focal length (positive = concave) |
| ho and hi | m | Magnification (also requires di or do) |
Most calculators also tell you whether the image is real or virtual. A real image forms on the same side as the object. A virtual image forms behind the mirror.
Real images are inverted. Virtual images are upright.
The Decision Tree: Step by Step Based on What You Know
This is where the decision tree comes in. Your situation determines which path you take. The calculator cannot guess what you know.
You have to tell it.
Branch 1: You Know the Focal Length and Object Distance
This is the most common scenario. You have a mirror with a known focal length. You place an object at a known distance.
You want to know where the image forms.
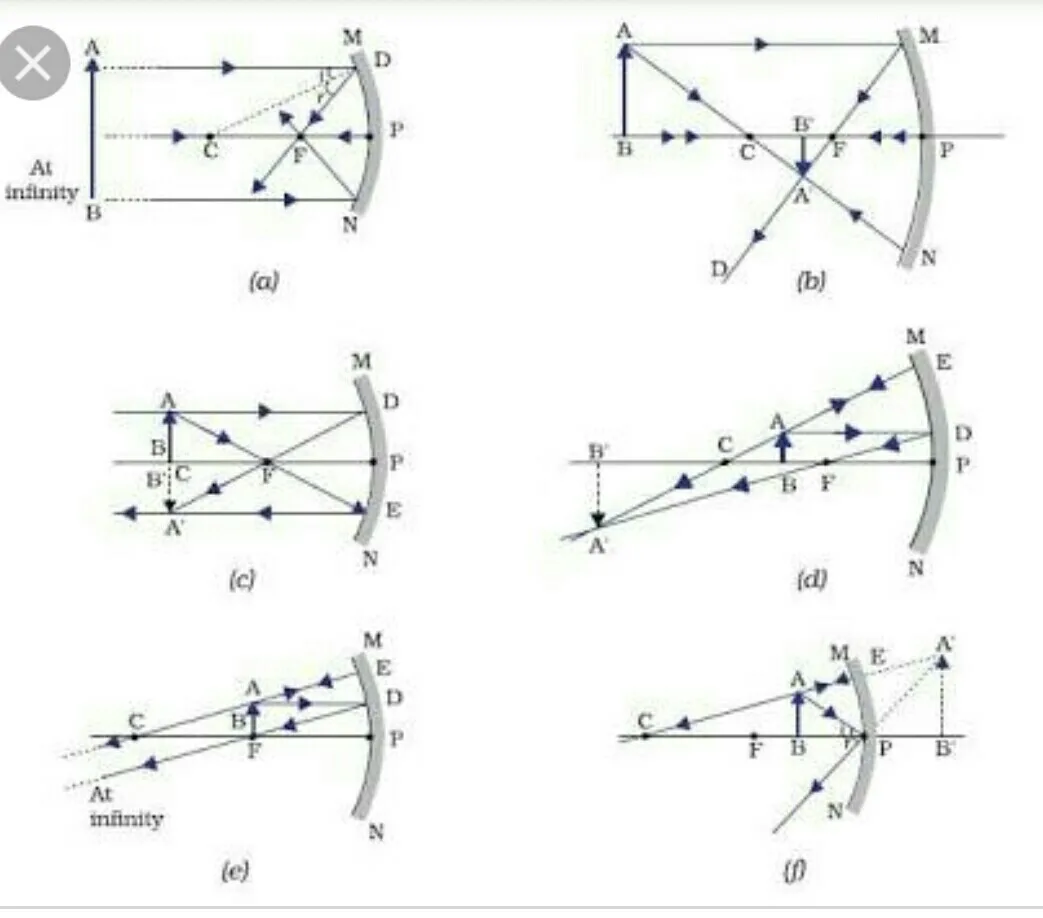
Steps:
- Enter
fas a positive number (e.g., 20 cm). - Enter
doas a positive number (e.g., 30 cm). - The calculator computes
di. - Check the sign of
di: , Positivedimeans a real image in front of the mirror.
, Negative di means a virtual image behind the mirror.
- The calculator also gives
m. Negativemmeans inverted.
Example:
- f = 20 cm, do = 30 cm
- Calculator gives di = 60 cm (positive, real image)
- m = -2.0 (inverted, twice the size)
What happens when the object is inside the focal point?
- f = 20 cm, do = 10 cm
- Calculator gives di = -20 cm (negative, virtual image)
- m = 2.0 (upright, twice the size)
Branch 2: You Know the Radius of Curvature
The radius of curvature (R) is the distance from the mirror surface to the center of curvature. This is twice the focal length.
R = 2f
If you know the radius, calculate the focal length first. Then proceed with Branch 1.
Steps:
- Divide
Rby 2 to getf. - Enter
finto the calculator. - Enter
do. - Read the result.
Common mistake: Users enter R directly as f. This doubles the focal length. The calculator gives a completely wrong image distance.
Branch 3: You Know the Image Distance and Magnification
This is less common but happens in lab settings. You know where the image formed and how big it is. You want to find the object distance or focal length.
Steps:
- Enter
di(positive if real, negative if virtual). - Enter
m(negative if inverted, positive if upright). - Use the relationship
m = -di/doto solve fordomanually. - Then use
doanddito findf.
Most simple concave mirror calculators do not have a direct two-variable input for this. You may need to do one step manually.
Branch 4: You Know the Object and Image Heights
You know the actual sizes. You want magnification and image distance.
Steps:
- Enter
ho(object height). - Enter
hi(image height). - The calculator gives
m = hi/ho. - If you also know either
doordi, you can find the other usingm = -di/do.
Real Scenarios: What the Calculator Tells You in Each Case
Let's walk through three real scenarios. These match what you would see in a physics lab or a telescope setup.
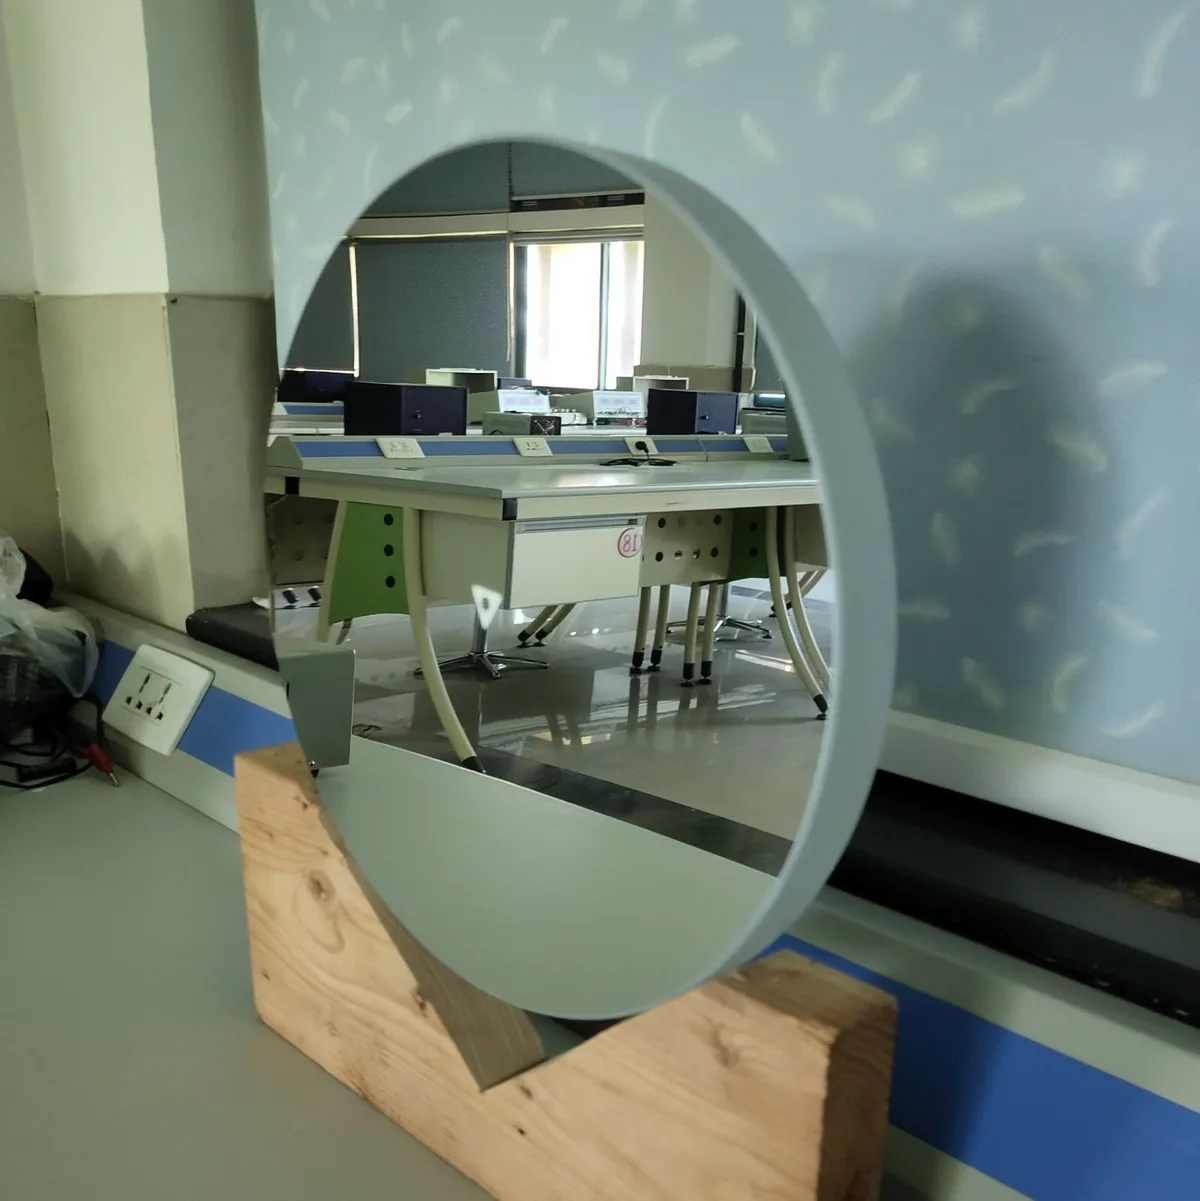
Scenario 1: Object beyond the center of curvature
- Mirror: 30 cm focal length, 60 cm radius of curvature
- Object at 80 cm (beyond C)
- Calculator: di = 48 cm (positive, real)
- m = -0.6 (inverted, smaller than object)
- This is a real image. It forms between C and F. You could project it onto a screen.
Scenario 2: Object between C and F
- Same mirror, object at 40 cm (between C and F)
- Calculator: di = 120 cm (positive, real)
- m = -3.0 (inverted, larger than object)
- This is a real image beyond C. It is magnified and inverted.
Scenario 3: Object inside the focal point
- Same mirror, object at 15 cm (inside F)
- Calculator: di = -30 cm (negative, virtual)
- m = 2.0 (upright, larger than object)
- This is a virtual image behind the mirror. You cannot project it. You see it by looking into the mirror.
Here is a summary table:
| Object Position | Image Position | Image Type | Magnification | Orientation |
|---|---|---|---|---|
| Beyond C | Between C and F | Real | Less than 1 | Inverted |
| At C | At C | Real | 1 | Inverted |
| Between C and F | Beyond C | Real | Greater than 1 | Inverted |
| At F | At infinity | – | – | – |
| Inside F | Behind mirror | Virtual | Greater than 1 | Upright |
Expert Tips and Pro Advice for Getting Accurate Results
After working with mirror equations and reviewing manufacturer specifications for optical components, here are the tips that actually matter.
Always confirm your sign convention. The standard Cartesian convention is the most common in textbooks and calculators. Focal length is positive for concave mirrors. Object distance is positive for real objects in front of the mirror.
Image distance is positive for real images on the same side as the object. Stick to this and you will avoid the biggest source of error.
Double-check your units. Use the same unit for all inputs. Mixing centimeters and meters is a common mistake. If you enter focal length in centimeters and object distance in meters, the calculator gives you a number but it is meaningless.
Test with a known case. Before trusting a calculator result, test it with a simple case. For example, if the object is at the center of curvature, the image should be at the same distance. If you get a different number, something is wrong.
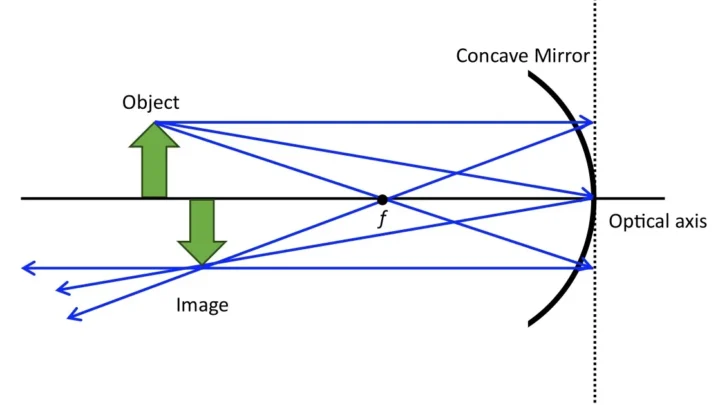
Use the ray diagram as a sanity check. The calculator gives you numbers. A quick mental ray diagram tells you if those numbers make sense. Is the image real or virtual?
Is it upright or inverted? If the calculator says real but your diagram says virtual, recheck your input.
Watch out for the object at the focal point. If do = f, the mirror equation becomes 1/f = 1/f + 1/di. This gives 1/di = 0, which means the image is at infinity. Many calculators show an error or a very large number.
This is correct. The image does not form at a finite distance.
Per NIST optical measurement standards, the sign convention is not optional. It is a built-in requirement of the mathematics. Ignoring it will produce results that are physically impossible. As of 2026, most educational calculators default to the Cartesian sign convention.
Always verify before entering data.
Common Mistakes to Avoid
Even with a calculator, errors creep in. Here are the most frequent ones we see in physics labs.
Entering the radius instead of the focal length. This is the number one mistake. A mirror with a 40 cm radius of curvature has a 20 cm focal length. Enter 40 cm as f and the calculator gives you a wrong image distance.
Always divide R by 2 first.
Forgetting to convert units. Mixing centimeters and meters is easy to do. Your calculator does not know you meant meters. It treats every number as the same unit.
If f is 0.2 m and do is 30 cm, convert one of them before entering.
Assuming every answer is physically possible. The calculator will give you a number for any input. If the object is inside the focal point, the image is virtual. You cannot project it onto a screen.
The calculator does not warn you. You have to interpret the sign.
Using the wrong sign convention. Some calculators use the "real is positive" convention. Others use the Cartesian convention. Know which one your tool uses.
As of 2026, most educational calculators default to Cartesian. But always verify.
Confusing concave with convex. A concave mirror has a positive focal length. A convex mirror has a negative focal length. If you enter a positive value for a convex mirror, the calculator gives you a result that makes no physical sense.
Not checking the object at the focal point. If do equals f, the equation returns 1/di = 0. Many calculators show an error or a very large number. This is correct.
The image is at infinity. No finite image distance exists.
Frequently Asked Questions
How does a concave mirror calculator work?
It uses the mirror equation 1/f = 1/do + 1/di. You enter two known values. The calculator solves for the third.
It also computes magnification using m = -di/do or m = hi/ho.
What does a negative image distance mean?
A negative image distance means the image is virtual. It forms behind the mirror. You cannot project it onto a screen.
You see it by looking into the mirror. Virtual images are always upright.
Can I use the same calculator for convex mirrors?
Not directly. Convex mirrors have a negative focal length. If your calculator allows negative inputs, you can use it.
Just enter f as a negative number. Otherwise, you need a convex mirror calculator.
What happens if the object is at the focal point?
The image forms at infinity. The calculator may show an error or a very large number. This is physically correct.
Parallel rays leave the mirror and never converge to a point.
What units should I use for the calculator?
Use any consistent unit. Centimeters are most common in physics textbooks. Meters work for larger optics.
The key is consistency. Do not mix centimeters and meters in the same calculation.
How do I know if my calculator result is correct?
Compare it to a known case. Put the object at the center of curvature. The image should be at the same distance.
If it is not, recheck your inputs. Also do a quick mental ray diagram to verify.
Decision Guide: When to Use a Calculator vs. Doing It by Hand
Neither method is always better. Each has its place.
Use a calculator when:
- You need a quick answer for multiple object positions
- You are checking your homework or lab work
- You are designing an optical system and need to iterate
- You want to avoid algebra errors in routine calculations
Do it by hand when:
- You are learning the concept for the first time
- You are studying for an exam that does not allow calculators
- You need to understand the relationship between variables
- You want to catch sign errors before entering data
Here is a quick comparison:
| Factor | Calculator | By Hand |
|---|---|---|
| Speed | Fast | Slow |
| Error risk | Low if inputs are correct | Higher with sign errors |
| Learning value | Low | High |
| Useful for exams | Only if allowed | Always useful |
| Multiple iterations | Easy | Tedious |
Our recommendation: Use the calculator as a verification tool. Solve the problem by hand first. Then check your answer with the calculator.
If they match, you are confident. If they do not, you know where to look for the error.
For real-world applications like telescope design or solar concentrator alignment, the calculator is essential. You will run dozens of cases. Doing that by hand is impractical.
For learning, the hand method builds intuition that the calculator cannot replace.

Similar Posts