How To Remove Scratches From Bike Windshield Effectively
If you’re tired of seeing those annoying scratches marring your bike windshield, don’t worry—you can restore clarity without spending a fortune. A simple polishing kit or household items like toothpaste or baking soda can often do the trick for minor scratches, while deeper ones might need more advanced techniques or professional help.
In a nutshell, start by assessing the scratch depth to choose the right method. For light scratches, use polishing compounds or household remedies; for deeper marks, consider sanding or professional repair. With patience and the right tools, your bike windshield can look as good as new in no time.
Scratches on your bike’s windshield can be frustrating and annoying, especially when they obscure your view and interfere with your ride. Luckily, fixing these scratches isn’t as complicated as it seems. Whether you’re a casual rider or a dedicated motorcyclist, knowing how to effectively remove scratches can save you money and keep your rides safe. The key is to identify the depth of the scratch and select the appropriate method—ranging from simple polishing techniques for minor scuffs to more advanced repairs for deeper damage. With a little effort and the right supplies, you can restore your windshield’s clarity and enjoy clearer, safer rides ahead.

How to Remove Scratches from Bike Windshield
Scratches on your bike windshield can be frustrating and may hinder your visibility while riding. Fortunately, there are several effective ways to fix minor scratches and improve the clarity of your windshield. This guide will walk you through step-by-step methods to remove scratches and keep your bike windshield looking clear and new.
Understanding the Types of Scratches
Before starting repair, it’s important to know the type of scratches on your windshield. Light scratches usually affect only the surface layer, while deep scratches go through the material. Surface scratches are easier to fix, while deep ones might require professional help.
Light Surface Scratches: These are minor marks that appear as fine lines on the surface. They are caused by dust, debris, or poor wiping techniques.
Deeper Scratches: These penetrate into the material, making them more noticeable and difficult to remove. They often result from accidental impacts or rough cleaning items.
Gathering the Necessary Supplies
Having the right tools and materials is essential for effective scratch removal. Here’s what you’ll need:
- Microfiber cloths
- Plastic polish or scratch remover
- Sandpaper with fine grit (e.g., 1500 or 2000)
- Polishing compound
- Water and soap
- Glass or plastic cleaner
- Masking tape (optional)
Ensure all items are clean and free of dirt before starting, to prevent further scratching or damage.
Preparation: Cleaning Your Windshield
Start by thoroughly cleaning your bike windshield. Use a gentle soap and water mixture to remove dirt and grime. Rinse well and dry with a microfiber cloth to prevent additional scratches during the repair process.
Clean surfaces allow you to see the scratches clearly and prevent debris from scratching the surface further during polishing.
Assessing the Depth of Scratches
Gently run your fingernail over the scratch. If your nail catches in the mark, it might be a deeper scratch that needs more intensive repair. If it feels smooth, you likely have a surface scratch that can be polished out.
For deeper scratches, consider professional help if polishing doesn’t improve the appearance significantly.
Methods to Remove Surface Scratches
1. Using Plastic Polish or Scratch Remover
This is the easiest method for minor surface scratches. Apply a small amount of plastic polish or dedicated scratch remover to a clean microfiber cloth. Rub gently in a circular motion on the scratch. Repeat until the scratch diminishes or disappears.
After polishing, wipe off any excess product and examine the surface. Repeat if necessary for stubborn scratches.
2. Applying Toothpaste as a Scratch Filler
Toothpaste can act as a mild abrasive to smooth out small scratches. Place a small amount of non-gel toothpaste on a soft cloth and rub it onto the scratch using gentle circular motions. Keep rubbing for about a minute.
Wipe off the excess with a damp cloth and check the result. This method works best for minor surface scratches.
Sanding Deep Scratches
1. Preparing the Surface for Sanding
Use masking tape to protect areas around the scratch. Lightly wet the scratched area with water to prevent excessive abrasion and to help control dust.
2. Sandpaper Technique
Use fine grit sandpaper, such as 1500 or 2000, soaked in water. Gently sand the scratch in a circular motion for a few seconds. Keep the surface moist throughout to avoid uneven sand marks.
Frequently check your progress to ensure you’re not removing too much material. Be cautious and gentle to prevent further damage.
3. Polishing After Sanding
Once the scratch is minimized, apply a polishing compound with a clean microfiber cloth. Buff in a circular motion to restore clarity. Reapply polish as needed and wipe clean with a soft cloth.
Using Commercial Scratch Repair Kits
Specialty kits designed for plastic and acrylic surfaces include all necessary abrasives and polishes. Follow the manufacturer’s instructions carefully for best results.
Often, kits come with multiple polishing pads, compounds, and instructions tailored for different scratch depths.
Preventing Future Scratches
Proper maintenance can help minimize scratches. Use soft microfiber cloths for cleaning and avoid harsh chemicals or abrasive materials. Park your bike in sheltered areas to reduce exposure to debris and sun damage.
Regularly inspect your windshield and address minor scratches before they worsen. We recommend using protective film or coatings for added durability.
Additional Tips for Best Results
- Always test repair methods on a small, inconspicuous area first.
- Work in a well-lit environment to see scratches clearly.
- Take your time during sanding and polishing to avoid uneven surfaces.
- If unsure about repairing deep scratches, consult a professional for expert repair or replacement.
Summary of Step-by-Step Repair Process
| Step | Action |
|---|---|
| 1 | Clean the windshield thoroughly with soap and water, then dry with a microfiber cloth. |
| 2 | Assess scratch depth by feeling with your fingernail. |
| 3 | Apply plastic polish or scratch remover for surface scratches. For deeper scratches, consider sanding with fine grit sandpaper. |
| 4 | Use polishing compound or a dedicated plastic polish to buff the area after sanding or if polishing alone. |
| 5 | Repeat as necessary, ensuring the surface remains clean and smooth. |
| 6 | Protect your windshield by using protective films or coatings for ongoing durability. |
By following these detailed steps, you can significantly improve the appearance of your bike windshield and enhance your riding experience. Keep in mind that patience and gentle handling are key to avoiding further damage while restoring clarity.
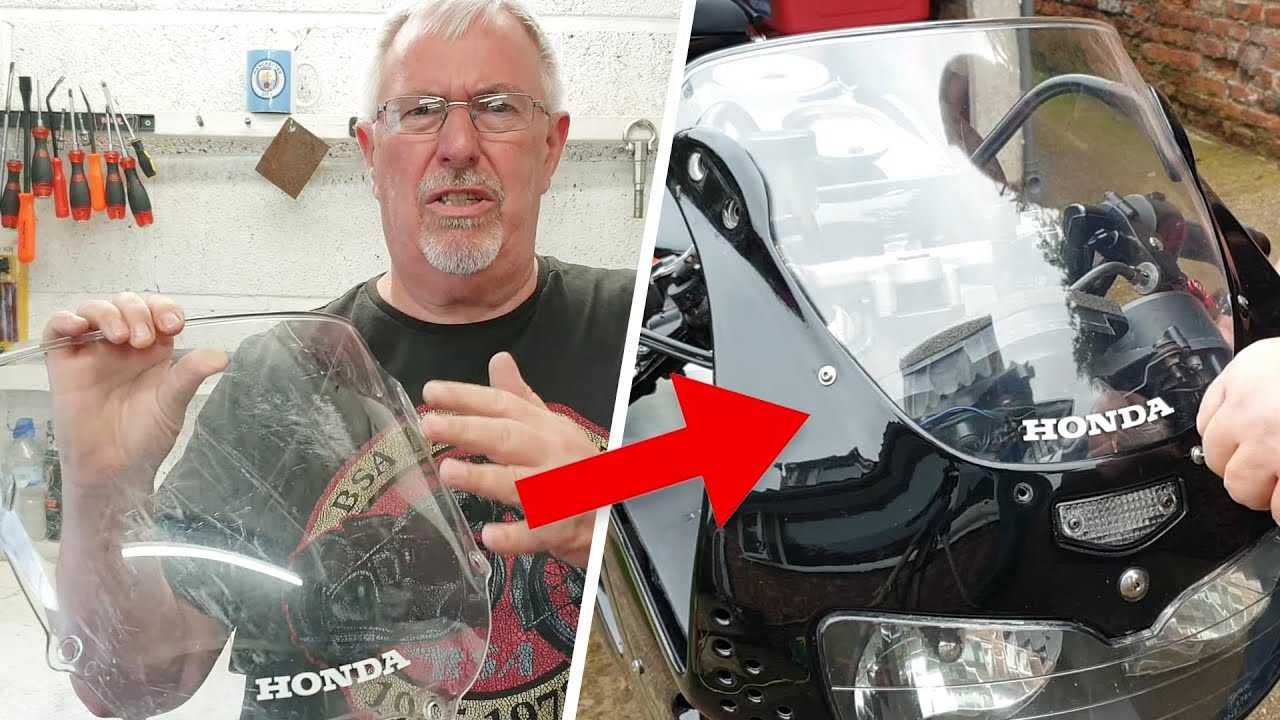
How to polish your motorcycle's windshield.
Frequently Asked Questions
What is the best method to minimize scratches on a bike windshield without causing further damage?
Use a gentle polishing compound designed for clear plastics and apply it with a soft, microfiber cloth. Avoid using abrasive materials that can worsen scratches. Carefully buff the scratched area in a circular motion, checking frequently to see if the scratches are less visible. This method helps to reduce the appearance of minor scratches without damaging the windshield further.
Are there specific products recommended for repairing deeper scratches on bike windshields?
Yes, specialized plastic scratch repair kits are available that contain compounds formulated to fill and smooth out deeper scratches. Always follow the manufacturer’s instructions and test the product on a small, inconspicuous area first. For very deep scratches, consider consulting a professional, as DIY repairs may not fully restore clarity.
How should I clean my bike windshield before attempting to remove scratches?
Start by rinsing the windshield with water to remove loose dirt and debris. Use a mild soap or a dedicated glass cleaner with a soft cloth or sponge, avoiding harsh chemicals that could damage the plastic. Gently wipe the surface to ensure it is clean and free from grit, which can cause additional scratches during the polishing process.
Can I use household items like toothpaste to remove scratches from my bike windshield?
While some people use toothpaste as a mild abrasive to diminish minor scratches, this method offers limited results and can sometimes cause additional haze or cloudiness. If you choose to try, use a non-gel, whitening toothpaste, and gently buff the scratched area with a soft cloth. Always test on a small area first and proceed cautiously to avoid damaging the surface further.
What precautions should I take to avoid creating new scratches during repair?
Use soft, non-abrasive cloths and high-quality polishing compounds designed for plastics. Apply gentle pressure and avoid scrubbing aggressively. Work in a clean, dust-free environment to prevent dirt particles from causing new scratches. After polishing, clean the windshield thoroughly to remove any residual compounds that could cause cloudiness over time.
Final Thoughts
To remove scratches from a bike windshield, start by thoroughly cleaning the surface with soap and water. Dry it carefully to avoid additional damage. Next, apply a scratch removal polish or a mild abrasive compound with a soft cloth, rubbing gently in circular motions. Buff the area until the scratches become less noticeable. Regular maintenance and careful cleaning help prevent future scratches and keep your windshield clear and smooth. Remember, knowing how to remove scratches from bike windshield can extend its life and enhance your riding experience.

Similar Posts