How To Use Resin For Windshield Repair Effectively
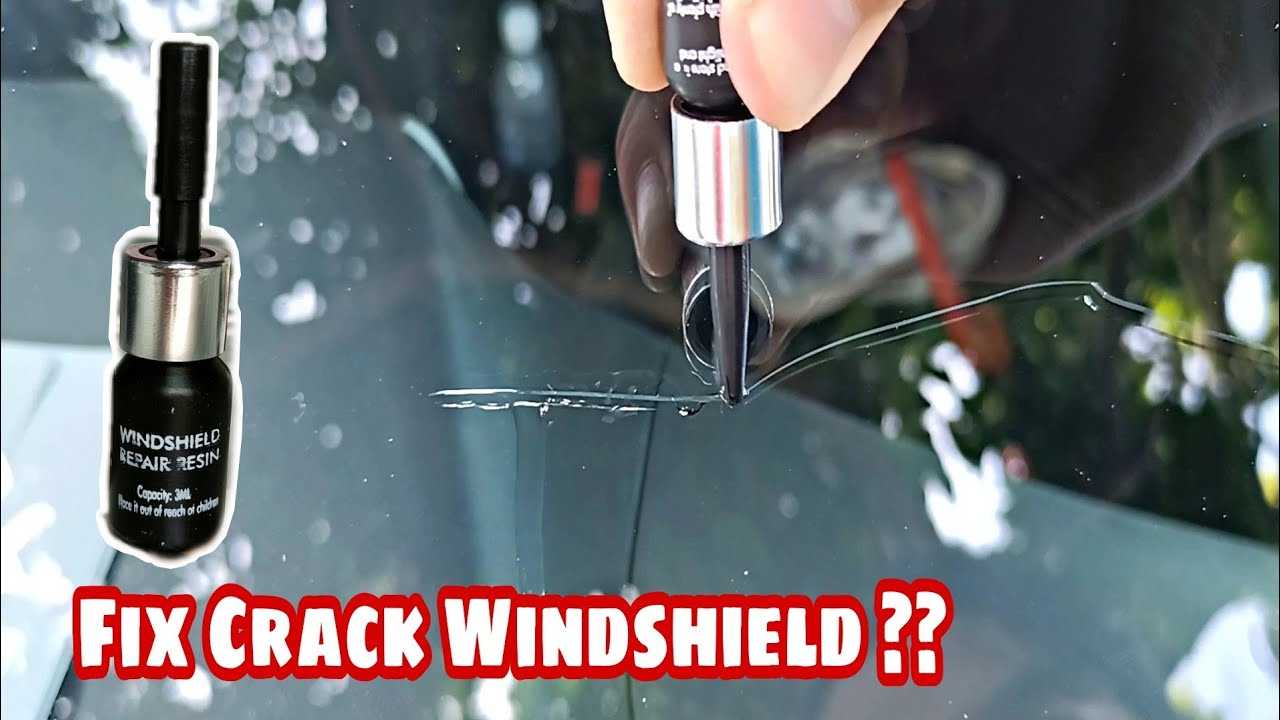
To use resin for windshield repair, clean the damaged area thoroughly, apply the resin carefully into the crack or chip using an injector or syringe, and then cure it with UV light or sunlight until it hardens, restoring clarity and strength. This simple process can prevent cracks from spreading and save you money on repairs.
Resin repair is an effective way to fix small chips and cracks in your windshield without needing a full replacement. By following a straightforward procedure—cleaning the area, applying the resin, and curing it—you can maintain your windshield’s integrity and visibility. This DIY approach is quick, affordable, and can significantly extend the lifespan of your glass.
Cracks and chips in your windshield can be more than just annoying—they can compromise your safety. Fortunately, fixing them with resin is a practical solution that you can do at home with minimal tools. In this guide, we’ll walk you through the essential steps to use resin efficiently, so you can keep your windshield in top condition and avoid costly replacements.

How to Use Resin for Windshield Repair
Understanding the Purpose of Resin in Windshield Repair
Resin plays a vital role in fixing chips and cracks on your windshield. Its main function is to fill in the damaged area, restoring the windshield’s strength and clarity. When used correctly, resin can prevent minor cracks from spreading further and prolong the life of your windshield.
Selecting the Right Resin for Your Repair
Choosing high-quality resin is essential for effective repairs. Look for resin that is specifically designed for windshield repairs and is compatible with your vehicle. It should be clear, UV-resistant, and have good adhesion properties to ensure long-lasting results.
Tools and Materials Needed
Before starting, gather all necessary tools:
- Resin Kit (including resin, curing strips, and applicator)
- Injector or syringe for applying resin
- UV light or sunlight for curing
- Razor or blade scraper
- Microfiber cloth or paper towels
- Isopropyl alcohol for cleaning
Preparing the Windshield Surface
Start by cleaning the damaged area thoroughly. Use a microfibre cloth with isopropyl alcohol to remove dirt and grease. Make sure the surface is dry before applying resin to ensure proper adhesion and curing.
Inspecting the Damage
Examine the chip or crack to determine if resin repair is suitable. Small chips and cracks less than 6 inches are ideal for DIY repair. Larger or complex damage may require professional attention to prevent safety risks.
Step-by-Step Resin Application Process
Follow these detailed steps to repair your windshield using resin:
1. Set Up Your Workspace
Find a well-lit, dust-free area to work. Cover your vehicle to protect it from debris and direct sunlight.
2. Prepare the Damaged Area
Remove any loose glass fragments using a razor blade. Clean the area again to ensure it’s free of dirt and debris.
3. Attach the Injector or Syringe
Place the resin applicator over the damaged area, ensuring a tight seal. This prevents air bubbles and allows for even resin flow.
4. Inject the Resin
Slowly press the injector to fill the chip or crack with resin. Fill until the resin slightly exceeds the surface level of the windshield.
5. Remove Excess Resin
Use a razor blade to carefully scrape off any excess resin while it’s still soft. Be precise to keep a smooth, even surface.
6. Cure the Resin
Expose the resin to sunlight or a UV light source. Curing times vary from 10 to 30 minutes based on the resin type and sunlight intensity.
7. Final Finishing Touches
Once cured, use the razor blade to remove any remaining resin residues. Clean the surface with a microfiber cloth and isopropyl alcohol.
Tips for Effective Windshield Resin Repair
Achieving quality results depends on proper technique:
- Apply resin in a dust-free environment to prevent debris inclusion.
- Ensure the resin is fully cured for maximum strength.
- Work slowly and carefully to avoid air bubbles during injection.
- Use a curing light for better control over the curing process in low sunlight conditions.
- Inspect the repair after curing, and repeat if necessary for better clarity.
Common Mistakes to Avoid
Avoid these pitfalls to prevent poor repair outcomes:
- Using low-quality resin that doesn’t cure properly.
- Not cleaning the damaged area thoroughly before applying resin.
- Applying resin in a humid or dusty environment.
- Inadequate curing time or exposure to insufficient light.
- Overfilling the crack or chip, leading to uneven surfaces.
Additional Repair Tips and Tricks
For best results:
- Repeat the resin injection process if the crack remains visible or the fill is uneven.
- Use a clarifying solution after repair to improve visibility.
- Consider professional repair for large or complex damages.
- Regularly maintain your windshield to prevent further chips and cracks.
- Always follow the manufacturer’s instructions for your specific resin kit.
Maintaining Your Repaired Windshield
After applying resin, take care to protect your windshield by:
- Avoiding car washes for at least 24 hours post-repair.
- Driving cautiously to prevent further damage.
- Scheduling professional inspections for large or multiple cracks.
- Replacing the windshield if repairs are no longer effective.
How to Extend the Lifespan of Your Windshield
Proper maintenance can help your windshield stay intact:
- Park in shaded areas to prevent UV damage.
- Keep your windshield clean from dirt and debris.
- Address chips and cracks early to prevent them from spreading.
- Use protective coatings or treatments to resist future damage.
Related Topics for Better Windshield Care
Explore additional resources:
How to Repair Windshield Cracks
Learn advanced techniques for larger damages beyond simple chips. Proper repair methods can prevent costly replacements.
Windshield Replacement vs Repair
Understand when a repair is sufficient and when full replacement is necessary for safety reasons.
Choosing the Best Windshield Repair Kit
Compare different kits based on resin quality, ease of use, and curing options to find the best one for your needs.
Safety Tips During Windshield Repair
Always wear safety glasses and gloves to protect skin and eyes from resin and glass shards. Work in a well-ventilated area to avoid fumes.
Environmental Considerations
Select eco-friendly resins and dispose of used materials responsibly to reduce environmental impact.
This comprehensive guide offers detailed insights into how to use resin for windshield repair, ensuring you have all necessary information for a successful DIY project. Proper preparation, application, and maintenance can help keep your windshield in good condition and safe for driving.
Windshield Repair Kit – How to Use
Frequently Asked Questions
What are the initial steps to prepare the windshield before applying resin?
Start by cleaning the damaged area thoroughly with glass cleaner to remove dirt, dust, and debris. Use a razor blade or scraper to eliminate any loose glass fragments around the crack or chip. Ensure the surface is completely dry before proceeding to prevent contaminants from affecting the resin’s adhesion. Proper preparation creates a clean and stable base for effective repair.
How can I ensure the resin fills the crack or chip completely?
Inject the resin slowly into the damaged area, making sure it flows deep into the crack or chip. Use a dropper or syringe for precise application and to avoid excess spilling onto the windshield surface. If necessary, gently tap the glass to help the resin settle into all voids. Filling the entire area ensures a durable and clear repair.
What is the correct way to cure the resin after application?
Expose the resin to direct sunlight or a UV curing light, depending on the type of resin used. Keep the area undisturbed during the curing process to allow the resin to harden uniformly. Follow the manufacturer’s instructions regarding curing time, as proper curing prevents cloudiness and ensures maximum strength of the repair.
How should I finish the windshield after the resin has cured?
Once the resin is fully hardened, use a razor blade or a fine abrasive pad to gently remove any excess resin on the surface. Then, polish the repaired area with a glass polishing compound to restore clarity. Cleaning the area thoroughly removes residual material, leaving the windshield smooth and clear.
What precautions should I take during the resin repair process?
Wear gloves and eye protection to avoid contact with the resin, which can be irritating. Work in a well-ventilated area to prevent inhaling fumes from the resin or cleaning agents. Follow all safety instructions provided by the resin manufacturer, and handle tools carefully to prevent injury or damage to the windshield.
Final Thoughts
To use resin for windshield repair, start by cleaning the affected area thoroughly. Sand the crack lightly to ensure the resin adheres properly. Mix the resin according to the instructions and apply it carefully into the crack using a small applicator. Allow it to cure completely before removing excess and polishing the surface. Following these steps will help you effectively repair your windshield and clear the crack.

Similar Posts